Tuesday 31 December 2013

Happy New Year 2014

We are recovering somewhat from the incredible amount of snow Mother Nature decided to spoil us with this Christmas. Today, the snow blower arrived that my husband got for Christmas (I'm trying to keep him alive!), which means, in terms of Murphy's Law, that the storm that is supposed to be heading our way will likely bypass us. I won't miss it, as we have had over a meter (3 1/2 feet or so) of snow in the last two weeks.

Santa brought me a mini! My youngest daughter gave me this delightful telescope (an eBay find) and the Tudor era map.


They will go into the apothecary shop setting, old medical professionals used to like being mysterious in order to impress the customers. The map is printed on photo stock, I'd like to try and age it a bit, has anyone tried to age photo-stock images with paints or inks?

Just to prove that I haven't abandoned the Apothecary Workshop, the front opening has been beamed and plastered, and is waiting for its paint; as well, the roof louvers have been painted, aged and applied, ready to be shingled. That can't happen until we do the upper half of the chimney stack, the next part of this project. It's kind of messy to do clay work with a house full of holiday stuff and our visitors, so that has been postponed just a little. Once the chimney is bricked, we can assemble the roof. I am working on it....


We are celebrating New Year's by going to the early, 2D showing of the latest hobbit movie. My daughter is hoping to have some friends in, so we "oldies" will lurk in the family room with the TV, while the youngsters play board games etc. all over the living and dining areas.

A Very Happy New Year to you all. May all your hopes and wishes for the new year come to pass, and may you enjoy the year in health and happiness, with lots of minis!

Wednesday 25 December 2013

A Very Merry Christmas 2013

This is the view outside of my bedroom window when I woke up this morning:


We have had very wintery weather the last 10 days, more than 40 cm of snow followed by freezing rain and ice pellets, and yesterday evening some more snow fell. It looks like a Christmas card outside. The sky is pale turquoise blue, and the sun is shining through the ice on every twig.


These photos are for all of you who wished for a White Christmas, but live in places where this just doesn't happen! Now we get to move the new snowfall out of the driveway....


My Christmas room box is having its debut on the blog. It is a design from Janet Brownhill, whose work I really do admire, that appeared in a Dolls House and Miniature Scene magazine several years. ago. This year, with the help of my daughter's friend, it also appeared on the mini Wiki Treasures Advent Calendar. Lots of paper clay work, and some experiments with artificial snow and other things, including some organic materials, have created a little Christmas scene that I am very proud of. It resides in its own box, which has a drawer underneath to hold the battery packs for the lighting, or any other thing one might like to put in a small drawer. The snow was given a little sparkle by a very light dusting of "diamond dust" sparkles on it, which catch the light like real snow sometimes does. The bricked wall slides out for access to the interior of the room.


The chickadee is the official bird of our province, and we see them all winter long on our birdfeeder, which meant I had to add them in miniature, of course! These three were modelled out of scrap Fimo and then painted with the aid of a bird book. The snow out of a jar also adhered very nicely to the logs, the window sill and frame (no glass to avoid reflections), and the little overhanging roof over the door. Good stuff, but once you open the jar, it pretty much dries out and can't be used again.

I wish you and your families a very Merry Christmas, lots of good food and good company.


Friday 20 December 2013

Still Working on the Roof Structure

The roof is slowly being built, in between all the other things that keep one busy prior to the very busy - insane, really - holiday season. I kind of wish Christmas was just a religious holiday again; the incredible commercial hype, and people's general bad attitude this time of year, do not make a good holiday any more. My youngest daughter, who works retail, comes home exhausted every evening, full of stories of angry, demanding customers....


Looking into the upper room from the front of the building, you can see the echo of the lower story doorway design. The floorboards are iron-on veneer tape, a job my C-in-C took on, and have been stained in my favourite Ipswich Pine. At this point, the inside has paint on it, a textured suede finish in a pale ivory colour. Because the ultimate view into this room is going to be very limited, I decided against putting in timbering. However, I will do a bit of timbering on the outside of the doorway, the panel has been set back a bit to allow me to do that. This area might only get one light, so it will be quite dark at the best of times.


These are the roof louvers, which have been assembled around a balsa wood core to make the whole construction sturdier. They will be painted, and the little roof panels for them will have slate tiling like the rest of the roof.  I would like to try using lead tape to make flashing around them, they did use lead for things like gutters and downspouts in the Tudor period, so I hope I am sort of correct.

Not the greatest leap forward in the design, but these little vents have taken more than a week to put together. I cheated, using very small strips from left-over miniature ship building to make the vents, rather than laboriously grooving each of the six panels. Each upper and lower edge has to be be bevelled to fit flush onto the angle of the roof, a lot of work.  Next, they will be painted and attached to the roof. The slate strips are ready and waiting, heaven knows when I will actually get around to that!

Thanks for sticking with the slower pace lately, I hope to get back up to speed again very soon.  A lot of people are visiting this blog; hopefully, this means I am not the only Tudor enthusiast in the world of miniatures. Let me know what you are doing, and what you think of my attempts....

Friday 13 December 2013

A Little Fairy Tale


This may well be the very first Camp MiniHaHa project I ever did; if it is not the first, it would be only the second. This delightful fairy was a project taught by the late Joy Parker of Swallowhill Dolls, offered in the community hall down the road from Debbie P.'s summer cottage in Harbourville, Nova Scotia, which hosted Camp MiniHaHa for a few years in the very beginning. At that time, we were 10 women sharing rooms and sometimes a bed, in order to be able to spend time with like-minded miniaturists and learn something new while having lots of fun.

This poor fairy was intended to go into a dome setting, with driftwood, shells, coral and the like around her little tidal pool. She has outlived two domes, and is currently living on a shelf in my closet so the cat won't make off with her. The last dome lived on a windowsill in the spare bedroom, and we have no idea how that dome cracked - we suspect the cat may have knocked into it, or else a guest had an accident and didn't want to own up to it! While pouring the resin for the pool, a serendipitous accident happened, and the resin developed some interior fractures, which look like sunlight is shining on the tidal pool. There are real, very tiny shells and fragments of coral in that pool, picked off the beach below the cottage.

Her wings are printed on a transparency and decorated with Swarovsky crystals. I love this little fairy, and will have to keep my eye out for yet another dome for her to live in - it just needs to be high enough to accommodate her, and wide enough for a little beach landscaping. Her dress is made from vintage lame fabric (that "e" should have an accent on it!), which reminded me of fish-scales, and seemed appropriate for a seaside fairy.

In the meantime, the roof has been cut for the apothecary workshop, the interior painted and flooring installed, and it is time to get to work on the roof vents. However, it is getting closer to Christmas, and I am finishing off some close-to-being-finished handwork projects, so the roof will have to wait a few more days. Then I will do an update, hopefully, to be followed by how to apply the roof strips.

Sunday 8 December 2013

How to Make Miniature Slate Roofs from Cardboard, Part 2

Between Friday evening and Saturday afternoon, I cut nearly 64 feet (more than 19 metres) of slate roof strips. My poor thumb was about to develop a blister when I decided I was done. I just hope it is enough to do the entire roof with! The poor roof has had to wait until the miter saw could be repaired, and despite two days of soaking with penetrating oil, we still haven't been able to remove all the bolts. Something in the saw is making it difficult, to say the least, to move it to cut the angles on the roof pieces. However, my carpenter-in-chief has decided to go ahead tomorrow, come what may, as the saw  will move with lots of muscle power.


As you can see, it is an awful lot of strips! (Note the dirty water at the right of the photo, this is what I used in step 6 below.)


Here is the painting process for the roof. All painting should be done from the uncut edge downwards, as the layers of paint will create interesting texture, when applied with a bristly or stiff brush. From left to right:

1. Paint all strips with a dark burnt umber, making sure you cover the sliver cuts, the long bottom edge and the two short edges. Allow to dry. (Wet painted cardboard can be fragile: handle with care!)

2. Paint all strips with charcoal gray, double-check your sliver cuts and edges. Allow to dry. You can now tell that painting the cardboard has strengthened it, as well.

3. Using a 1/2" (1.5 cm) bristle brush, and pewter gleam paint (or a similar paint), dry brush here and there along the strip. Slate has some reflective inclusions, and that is what this dully metallic gray-silver paint step imitates. Allow to dry.

4. Using sludge green, a.k.a. English ivy green, a fan brush if you have it, and a nearly dry brush, brush on here and there along the strip. You want a streaky effect, that almost disappears into the background. This imitates the algae/moss streaks stone roofs develop. Allow to dry.

5. Using terra cotta and the fan brush, again a nearly dry brush, brush here and there along the strip. This adds extra dimension to the slate strip, and should just skim the higher points of the cardboard.
Allow to dry.

6. Mix up a couple of drops of white with a spoonful of dirty water - I use the water I rinse the brush in. This is messy; dip an old toothbrush in the watery paint, then gently run your fingernail along it to drop little spatters of white here and there. As this watery mixture dries, it looks like little patches of gray lichen, grayish in the centre and lighter around the edges.

The last coat to go on is a coat of satin varnish if you want a little shine, or matte varnish if you want no shine. This seals the paint effects. Allow to dry. The roof strips can now be installed.

Part 3 will be applying the strips to the roof surfaces, but this will have to wait a couple of days if the saw won't cooperate. As well, I have to make half a dozen roof vents to be glued to the front roof before the slate goes on. I'm going to try adding "lead" flashing around the vents, under the roofing strips, using the silvered copper tape I had been using for window lead. It didn't work too well for that, so I'll see if it will make good flashing, so it isn't wasted.


Friday 6 December 2013

How to Make Miniature Slate Roofs from Cardboard Part 1

As promised, here is a tutorial with photos on how I make my cardboard roofs, in which people have expressed quite a bit of interest.  Start with collecting lots of cardboard, the type that comes on the back of writing paper pads is great, but the best cardboard, because of its size, is the back of flip charts. I no longer have access to this, as neither of us are working in offices any more, so I zealously save any and all writing paper backs.


Two of the pieces are thicker than the others, so I have decided not to use those on this project; it is best to use card of equal thickness. You will also need knives, blades, a long ruler and a pencil. Cutting through cardboard is hard on Xacto-type knives. If you have access to an office paper cutter or  stationery guillotine, that cuts the work down tremendously. (Metric measurements are as close as I can approximate; you can work out your own proportions if you don't have access to a British Imperial ruler in inches.)


Start by slicing your cardboard into 3/4" (approx. 2 cm) strips. You will need lots, each strip will only be covering 1/2" (approx. 1.5 cm) of your roof surface. Mark a line 1/4" (.7cm) along one long edge; this is where the strips will eventually be glued. Divide your marked strips in two piles, and mark the other long edge at 1/2" - 1.5 cm intervals, on one pile. Start the other pile of your strips with a 1/4" - .7 cm line, then continue on with 1/2"-1.5 cm as before, as the slates will overlap like a brick course.
While you can cut the half slates as you glue the strips to the roof, I find I get a more accurate fit if I start half of my strips with a half slate, and I also don't have to repaint that cut edge later.

 One side of  these card strips is white, this is the wrong side as it will not accept paint the same way as the raw cardboard side. Below the two white strips along which I have started cutting, you can see two completely cut gray strips showing the eventual overlap. Now cut all your slate strips as marked, taking off a tiny sliver at each cut, stopping at the marked line at the top, and once in a while cutting off a corner to suggest the odd damaged slate. For this cutting I use scissors, but if you are good with a knife, you could  use that.

As this will take quite a bit of time, and your fingers will likely get sore, this is where I will leave it for today. Part 2 will be the painting of the slates.

Tuesday 3 December 2013

Still Working....

We've been putting the last little finishing touches on a couple of recently finished projects, such as framing and veneer, licks of paint and the like. Not very photogenic, which is why there are no photos. I am still waiting for the roof components, seems like every day something new comes up. However, one of these days they're bound to appear. And then I'll do a how-to on making roofing slates out of cardboard.

The Mini Wiki Advent Calendar is open, I have a spot on Dec. 23, when my page will open. The photos on my spot will appear in this blog on Dec. 25. As well, I've been following a French advent  calendar site, they do how-to's every day of advent. Check out this address,  "Miniatures & maisons de poupees", then click on "le calendrier de l'Avent 2013: although the site is in French, you can probably have google translate it. There are also links to previous advent calendars on their site with more how-to's.

If time allows, as I am finishing off other projects before Christmas, I'll post another flower how-to later this month, probably hollyhocks made with coffee filters; however, be prepared, they take several days because of the many steps involved, mostly waiting for paint and glue to dry.

Thursday 28 November 2013

Tudor Apothecary Workroom Nearly Done....

It would be pretty much done if only I could find the piece of plexiglass I cut to fit into the window opening. I leaded one piece of plexi, but it was the end I had cut the real window off of, and which I mistook for the actual window. Despite having searched everywhere, I can not find the missing piece, and I need it as I am out of large pieces of the stuff. You wouldn't think it would be that hard to find a transparent piece of plastic measuring 4.5 by 2.5", would you?

However, I did take photos so you could see the aging of the outside of the structure, as well as the two sets of window shutters. The first photo is both the chimney wall and the window wall:


The upper edge beams are not glued on as the interior has to remain accessible until we install the lighting. The design on the shutters is one I remember from my childhood in the south of The Netherlands; these were red and white or green and white, and  castle gates and barn doors were often painted in the same hourglass-type design. I thought the workroom needed some colour, and green complements red, so I added a bit of my childhood to the build. I may do the outside of the shop's drop-down shutters in red-and-white, just for variety, as the shop has far less brick and way more plaster. Also, I think this half of the work room and shop combination will get a "slate" roof, again to tone down all that terra-cotta.


The remaining raw MDF edges will be covered in stained, iron-on veneer. The interior hasn't been aged yet, I will do that when I arrange the furniture, as furnishing placement will affect wear on the floor and the walls. That will have to wait for after the holiday season, as I have to get cracking on various items of knitting and embroidery that need finishing, unless the pieces for the roof arrive. Then I will do the roof in between the other handwork!

The cube is up on blocks because it has a buttress on the back corner, to hold it steady when the two hinged buildings are separated to get at the interiors. The other cube, which holds the shop, is fixed to a base which appears like a cobbled courtyard when the two cubes are hinged open, so this "swinging" portion needs a sturdy support.

OK, back to work to see if I can find that blasted piece of missing plexiglass! Considering I started this Nov. 1, 2013 it`s gone nice and quickly, thanks to wanting to have something to share with the people who read my blog.

Monday 25 November 2013

Tudor Apothecary Workroom - Brickwork Is Finished


All the brickwork is in place, the grout has been painted in, and the bricks have had a colour-wash to vary the terra-cotta a bit. As well, the very white exterior plaster has been toned down a bit with a dirty water wash. Next is the aging process; greenish along the bottom where the damp has come up, brownish under the wood where weathering has taken place, and dirt and discolouring on the plaster-work as the building has been around for quite a long time; it's been a few years since it was last lime-washed....

Some of the corner beams have still to be cut and fit into place, and the window and shutters are the next thing to do after the aging.  Once the cube is done, it will get its roof. That will lead to sore fingers, as I will have to cut a kilometre or so of cardboard tiles for both this roof and the roof of the apothecary shop building I hope to start in the New Year. I cut left-handed using right-handed scissors, and I need to take regular breaks when cutting roof tiles.

 Over the weekend my daughter had a friend visiting, and the friend kindly and patiently uploaded my Christmas vignette to the Miniwiki Advent Calendar; do check it out, the first Sunday of Advent is this weekend. One page opens each day; some are just eye candy, like mine, I hope, while others are instructions on how to create mini Christmas items. People add things from all over the world, it is well worth visiting.

Now I will relax with a little TV - providing I can find something worthwhile to watch! It is too dark to do aging on the structure, to do that properly I need daylight.

Friday 22 November 2013

Tudor Apothecary Workroom: Window Wall Is Bricked


OK, I started on the left side and that is now pretty dry, but the closer you get to the right, the wetter the paper clay is. Usually I work in slabs that fit the space, as in the Tudor Market Hall, sometimes I work in rows, as in the vault ceiling; in this case I had to cut bricks to fit sections together. It is not altogether even, but I think by the time I paint the mortar lines and vary the colour of the bricks, it will look better. And practice can only improve my technique!

Although each 3/4 by 1/4" (approx. 2 x .8 cm) brick is carefully shaped and textured, some of that does get lost as the clay dries. And while I roll the clay out between two battens to get a uniform thickness, there is still some variation. Fortunately the clay can be sanded and cut after it dries, which means I can tidy up the bits that really irk me.

My carpenter-in-chief was able to find some self-adhesive lead tape for me today, at a business that repairs sports equipment. This means I can do a nice leaded window, suitably aged, with the glass distorted as it would have been in the Tudor period. Tomorrow I hope to brick the chimney wall, and the c in c has already dug out wood to make the separate roof. For that, I get to build 8 or more small louvered roof vents, so I'd better figure out a way to get them all the same size. As mentioned before, cutting straight lines is so not my forte....


Thursday 21 November 2013

Tudor Apothecary Workroom - Front Arch Is Plastered etc.


Yeay, the front arch has its stone masonry, beams and plaster. The side beams are just taped on at this point, as I need to glue and screw the front in place before applying them. I decided to do a "stone" frame for the arch, to help tone down all the terra-cotta on the structure. The "plaster", made up of paper clay, is still very wet here, so it looks gray rather than white. The ghost of the brick oven on the back wall is where I allowed a depression in the plastering to hold the oven nicely in place.

The stone facing of the arch is also paper-clay, and each stone was shaped individually to fit into the arch's curve. Although it is hard to see in the photo, the stones that meet the wood beams are larger and taller than the other stones; again, this is for variety.

Oh dear, I forgot to marble the edge of the right front bracket! The raw edges of the MDF will have an edging of iron-on veneer tape when the whole structure is complete. There will be another beam across the top, which will go on once the top is screwed and glued on.

I was able to find some nice, simple half-round moulding to trim the front edges of the pawn shop. It is not easy to find 3/8" (approx. 1 cm) wide moulding in regular hardware or building supply stores.
So now it is on to bricking the chimney and window walls. Oh, my back and shoulders ache just thinking of it! As the clay dries fairly rapidly in our heated house (temperatures are reaching below freezing at night), I have to work pretty quickly, and when I concentrate, I tense too many muscles. But it will be so nice to have the walls done!

For some reason, when I publish the blog, one of the paragraphs develops an extra space. And I can't edit it out, because the space is not there in the draft version. Is my computer becoming self-aware?

Monday 18 November 2013

Tudor Apothecary Workroom Build - Chimney is On


Not terribly exciting! However, it is a good step forward. Next is bricking the lower story of the workshop cube on the chimney and window wall sides. The original chimney rested on a couple of tiny corbels, which seemed much too small to support all that brick-and-mortar mass; another 12" (30 cm) of chimney are coming with the separate roof, and then there are the chimney pots on top of that. For that reason, I decided a "stone" corbel would look rather more sturdy. Since the workroom is supposed to have Roman provenance, and the Romans built with stone, it is probably authentic.

This photo does show the unpainted colours of the DAS paper clay I use; the upper story used the white version, while the chimney is the terra-cotta. The clay takes paint and colour washes very nicely to make different shades of brick or plaster; that will be done once the whole wall is in place.
I can beam the left edge tonight, while the right beam will be placed to match up with the beam on the window wall. In order to have it look like one large beam on the corner, it will be cut to measure.

Tomorrow I am off for a mini day with two old friends; we haven't all been together for a very long time, as we dealt with various illnesses and participated in family events (two weddings in my case), so I am looking forward to it. As well, I have a quilt guild meeting in the evening, which means no mini-ing until Wednesday. There's still the brick or stone, timbers and plastering of the arch face to do on the side opposite the window wall. The back wall will simply be painted, as it is unlikely to be very visible.

Currently, the walls are screwed into place; Wednesday they will also be glued, prior to the rest of the bricking being installed. Then there will be lots of ageing and painting to be done. I had hoped to have this built before Christmas, and I think I may succeed!

Sunday 17 November 2013

Still No Photos, Hard at Work

Today I made the brick for the lower chimney of the Tudor apothecary workshop; it consists of terra-cotta DAS draped over a block of wood, definitely not worth a photo! I also beamed and plastered the upper chimney wall, again not terribly interesting. I'm hoping the chimney bricking will be dry tomorrow, then I can install it and that might be worth a photo. It stretched somewhat as I was gluing it on, but my carpenter-in-residence says it looks good, so I will trust his opinion.

The last couple of days I've been doing a fair bit of internet research in regard to apothecary interiors in the Tudor/Elizabethan era. In the process, I stumbled onto two wonderful blogs, which I will include at the bottom of this post. I do wish I knew how I could create a link from my blog to other blogs I go back to regularly, but as I've said before, I am not much use on the computer....

In the research process I found some wonderful images for Tudor apothecary gardens, which I have duly written down, because I will forget otherwise! There was one delightful vignette, in Real Life size, of a very weathered, small, unpainted bench, with a straw beehive at one end and an old stone sink with plants on the other; no room for people, but the piece is so evocative of age and wear that I will try to reproduce it in miniature when I come to do the garden for the apothecary - next Spring, perhaps. My carpenter suggested the garden, which means he will have to build the basic form for me, right?

The lights for the workshop are also being considered, I hope to get some advice from the people who can supply me with what I need. I want a smouldering fire effect in the brick stove, as well as a candle on the worktable and hopefully, a floor candle-stand to hold 4 or 5 candles. All of them should be LED lights working off a battery, which I can hide under the floor as it is raised an inch or so. LEDs are my favourite, as the batteries really last and they are so very portable, much easier and better as far as I am concerned than lighting on the mains; no need for plug-ins at shows.

So go and visit the blogs below, if you are as interested in Tudor/Elizabethan as I am and enjoy fantasy as well, you will be glad you did! Make a cup of tea and give yourself at least half an hour....

http://onbeingaminimum.blogspot.com
http://theinfill.wordpress.com

Friday 15 November 2013

Rehabbing a Few Older Projects

The Tudor Apothecary is off to one side for the next few days, while I hem rugs, sew and stuff cushions, and do a bit of rehabbing on my Christmas vignette. This will be on the Miniwiki Advent Calendar this year (come h**l or high water!) and needed some tiny items re-glued or re-waxed into place, as well as some lighting changes and the like. As I want to debut it on the Miniwiki, I'm holding off photographing it at the moment.

I'm in the mood to do a Christmas market stall, as I have quite a bit of Christmas stuff to go into it already, and it would be a great excuse to try some other small Christmas projects to fill it. A few years ago my husband and I spent Christmas in Bremen, Germany, where his sister and her husband live. While there, we visited the Christmas market, and what a feast for the eyes that was! Not to mention the scents, of gingerbread, hot cider, pancakes and gluhwein.

My stall would not be restricted to any one product, like gingerbread or straw ornaments or wooden decorations, but would sell a little bit of everything. This has led me to go back to my magazines to try and find a suitable stall; it needs to have a back with shelves, a roof and a front display area or counter. And it can't be too "different", as it will eventually have to share space with my between-the-wars market setting. I haven't been able to find a design, but will run a few photos by my builder-in-chief, aka my husband, to see if he could do it without a specific pattern. If I could fly to Europe right now, I have no doubt I would find the perfect little stall....

As well, I came across another perfect plant for my apothecary garden, pot marigold or calendula, and found a design for it in the recent AIM on-line magazine. The advent calendars created by various mini groups are also an incredible how-to resource, I intend to bookmark the lot so I can go back and visit regularly. And I need to make some polymer clay food items, both requests from others and commissions, as well as things I'd like to try, but my fingertips are very rough at the moment, from all the paper-clay work I've been doing.

So off to rub emollient into my fingertips! Hopefully, I'll have some photos for you soon. And I hope to spend a day with two mini-friends next week, weather permitting, as two of us will have to travel for nearly two hours by car - no snow allowed, please....

Monday 11 November 2013

Tudor Apothecary Workroom Build - The Floor is Tiled and Grouted


The tiles are grouted, and the grout has been dirtied up a little with a paint wash. I staged the photo to show a small sample of the many objects I've collected over the past couple of years that will go into the apothecary workroom and its associated shop. The bench was borrowed from the Tudor Market Guild Hall, as I have made no furniture yet for the apothecary. I have to see how everything fits together before I decide on furnishings. There will definitely be a skeleton somewhere, and perhaps a "stuffed' crocodile, these shop-owners tended to enjoy injecting a little mystery into their profession.

You can see a couple of the tripods, mentioned in a previous post, on the brick stove, one of them is under the clay jar. I just love the tiny test tubes, I got those at Birmingham Miniatura last year, along with some of the wonderful pots and bottles. The mortar and pestle was acquired at NAME National in Nashua, New Hampshire quite a few years ago, just waiting for this to be built. I have also got a gorgeous wooden one, made by Pear Tree Miniatures, that will go into the shop half of this building.

Exterior matte varnish and satin varnish do not mix; you end up with something that looks like oil on water, so I'm glad I did a sample on a broken tile. Two applications of acrylic satin varnish were enough to waterproof the paper clay tiles, so the grout was easily applied with my fingers and then washed off the surface of the tiles with a small sponge. The grout will be dirtied up some more in areas of "wear" when I place the furniture.

Speaking of furniture, I think I have to go with a green shade, just to offset all the terra cotta. There's a lot of orange in the workroom right now. Normally I would just stain Tudor era furniture, but too much of a sameness in the colour makes everything become semi-visible. Green should complement things nicely.

Tomorrow I hope to make some bricks to edge the vault façade and to go above the window. Once the bricks are dry, I can do the beaming and plastering of the façade. So far, I've used a full 8 oz package of terra cotta DAS, and about 3/4 of a 16 oz. block of the white. And I've only just begun....

Welcome to my new followers, I'd love to know if you are as enamoured of Tudor as I am! Of course, I don't have to worry too much about straight lines and angles working in that period, which is my main reason for getting involved in it; I could probably not cut a straight line if my life depended on it!

Sunday 10 November 2013

Tudor Apothecary Workroom Build in Progress - Plaster and Floor

The floor tiles took 4 days to dry completely, longer than I had expected. Until they were in, the building couldn't be put back together, so I am glad that it is now mostly done.


I had to decide whether to lay the tiles in rows, or staggered like bricks. They look better in more or less even rows - they aren't perfectly even, as there are minor variations in size and thickness. I cut them 1" (2.5 cm) square, then dabbed assorted colour washes on them for variety. The walls are plastered in paper clay, with a thin coat of diluted white acrylic to represent whitewash. Everything needs to be dirtied up and aged, of course, but that comes later. The chimney hood is in place, with its "marble" brackets, and the "marble" support brackets for the bricked vault.


The brick vault fits nicely on the support brackets. The arched front will be covered with a beam and plaster façade. The stove sits comfortably on the floor tiles - I had to leave an opening in the plaster of the back wall to keep it snug to that wall. I think these tiles would look good with a satin gloss, over which I will apply two coats of matte exterior varnish to waterproof them before doing the grouting. In order to make sure that will work, I have to varnish a sample tile first. It would be silly to do satin only to have it disappear when doing the matte over the top.


And a quick view of the plastered outside upper story, faux windows and all. These will be hidden behind shutters. The "stone" drip hood above the window will be placed once I have bricked the lower story. Again, no aging as yet, as I have to "plaster" the side of the box, around where the chimney will go, as well as brick the lower half of it. The window will be installed when the outside is bricked.

We had the first snow of the season today....


Thursday 7 November 2013

Another Miniature Carpet - My Favourite Ever

We've just gotten the power back after a 90 min. outage, likely due to the mad rainstorm and wind that blew through around dinner time. As the floor tiles for the Apothecary Workshop haven't dried as yet, and I can't proceed until I tile the floor, I though I'd share my very favourite miniature rug ever with you.


I worked it quite a few years ago, it was then intended to go into the living quarters of my artist's studio. What I love about this little rug is the variation in the colours; the proper word for it is abrash, which is probably Farsi, the language of Persia. Abrash refers to the colour fading caused by the vegetable dyes traditionally used in Persian carpets, mimicked in this little rug by small variations in the red, blue and green colours. The thread used for this was Anchor, which I had to travel far and wide to find; one small general store on the French Shore in Digby County, NS was the only place then carrying it in the Canadian Maritimes. I photographed it against my Real Life hardwood floor, which complements the colours wonderfully; they glow like jewels.

Sadly, I can't remember where I found the chart for this rug, nor who the designer was; I should dearly love to see more of her work, and acquire more if it is anything like this little rug. I believe the chart was in one of the three UK miniature magazines, at least ten years ago.

This little carpet may be too grand for an artist's studio; that is why it is currently kind of homeless. I really need to make a setting for it to show off the wonderful colours. Perhaps once I finish up the many UFO's currently occupying space in my workroom it will finally find a home!

Tomorrow, hopefully, I can get back to the Apothecary Workroom; the back wall needs to be plastered, but it has to be done with space left for the brick stove and the stove hood, as well as the decorative "marble" moulding holding up the bricked vault. The stove hood and corbels for it also need to be placed, with screws and glue as they are quite heavy, before I brick the lower walls. And, of course, I have to place the chimney and decide on places for wiring to go. The brickwork will likely take a good stretch of time to sculpt, too. The particular brand of paper clay I use, DAS, has an alcohol-type smell, and it gets to me after I've been working with it for more than an hour or so.

Monday 4 November 2013

No Photos Today, As Paper Clay Drying is Boring!

The inside walls of the Tudor Apothecary are drying, as I was able to skip the brick lines I thought I'd have to make. Apparently, and why didn't I realize this, the Romans plastered all their inside walls; then they painted them, either with gorgeous scenes or faux panelling and pillars. So, I went ahead and did two of the walls. Hopefully, they will be dry tomorrow, ready to sand, paint, and age.

The difficult wall to paper clay will be the one with the stove and hood on it; no paper clay where they will go, so things will stay in place. Also, I have to start drilling holes to take wiring; in all likelihood, I will use LED lighting on batteries, those have to be researched to see how many and so on, as I've only installed single LED's so far. I'd like to make a four-arm candelabra for the work room, as well as a fire in the hearth, and a wall sconce or two. Then all the wires will have to be hidden somehow, on the outside back wall most likely. Things to ponder....

The "marble" vault supports and hood brackets are painted and ready to install once the walls are done. The "stone" drip mould looks pretty good, so it is ready to place once the lower front wall is bricked. The beams on the upper front wall are in place, so as soon as the inside plastering is dry, I can tackle the outside plaster. Right now, all the walls are disassembled as they are so much easier to work on when they lie flat. And I have to put either stone or tile on the huge floor area,  nearly144 square inches! Paper clay floor tiles have to dry under a weight, so they take several days to dry completely.

The new, thinner front arch has been cut, that will need bricks on the arch area, and timber supports with plaster on the rest of it. And I have to figure out a nice way to finish the front edges of the MDF carcass, usually we iron on veneer tape. In the case of this building, however, the edges would likely have to be painted. More decisions to make. And we need to cut the lower half of the outside chimney, as it will have to be considered in the outside brickwork.

Saturday 2 November 2013

MiniatureTudor Apothecary and Workroom Buildings by Brian Long


This is the basic design of the next build, a Tudor Apothecary shop and attached workshop. The project is by Brian Long, for Dolls House and Miniature Scene, and ran over 4 months in 2007 and 2008. The carcase of this project was a gift - I can't remember if it was Mother's Day, birthday or Christmas - a couple of years ago, and it has been sitting and waiting for me to get back to it. Well, today I began again. The instructions are very sketchy, so I am having to extrapolate quite a bit from the photos.

It is hard for me to leave anything alone, and so it is with this one. The workshop, with the large arched opening, has a vaulted ceiling, nicely finished in the original with brick paper - I used paper clay. That part is  long since done, and it was a job and a half. The base for the paper clay ceiling is part of a concrete footing tube.


This is a photo I took of the process, two years ago. I made long slabs of brick and placed them side by side in the "vault" and once dry, added cement lines and colour-wash to the bricks. The cube for the workshop is about 12" (33 cm) to a side. The workshop is intended to be a re-purposed Roman vaulted room, so the bracket holding the ceiling needs to be faux finished to look like marble. Back then, I also made a Tudor brick cook stove and a hood, which will go against the back wall. All of this interior space needs to be bricked, and the bricks need to look as if they've had several centuries of whitewash, so the brick lines need to be rather faint.


Last year, I saw stoves just like this in Hampton Court Palace; Henry VIII had all his meals cooked on these stoves . I did learn that I'd need a metal tripod to place above the cook holes, and that the pots were primarily pottery, terra cotta with a green interior glaze, so I will have to take up potting with polymer clay one of these days. The stoves are almost identical to Chinese cooking stoves, which have a wok sitting over the hole, with steamers if you cook more than one thing at a time on top of the wok. And I picked up three tripods at Birmingham Miniatura, although one lost a leg and will have to be repaired.


This is the side of the workshop I am currently working on. The upper windows are false, as they sit above the arch inside, and will get shutters. The lower window will be glazed, I am currently ageing and staining the timbers for the window lining and the beams of the building. The lower half of this building will be bricked, the upper plastered between the timbers, and the drip mould will be faux finished to look like it was made of stone (I hope).

My work table is an unholy mess, so I have to tidy that up before continuing on. Another change that is coming is the façade with the arch; it is going to be thinner, to allow me to timber and stucco it. No allowance was made for that in the original design, and it has to be set back to allow the piano hinge that holds the two eventual buildings together to fit properly. The other façade was set back ready to receive timber and stucco, and I'd like the two to match better.

Check back regularly to see how this building progresses. It will, no doubt, be interrupted for other, more important things, but I'd like to have it done over the winter. Then I can go back and complete some of the other UFO's I have sitting around. Long post, but I wanted to give you an idea of what is involved in this particular miniature. My husband isn't too fond of British instructions, he finds them rather sketchy and of course, they use UK terms that we then have to translate. This is  the fourth British project he has cut out for me; the others include the Tudor house, Tudor Market Hall, and the garden shed project. The Pawn Shop came from a Dutch publication.


Friday 1 November 2013

The Shop and Garden Project - An Update


This piece came with me to Camp MiniHaHa '13 to go into the display room. Before heading off for camp, I made a few small additions to the outside. The door still needs hinges and a doorknob, I am looking for a way to make my own. The sun sculpture was a gift at CMHH '12 and is perfect for the side wall. There is a Bonnie Lavish dandelion growing up against the fence, another CMHH '12 gift. The weathered zinc planter with lavender plants is a design from 1 zu 12, the German magazine; the planter is the bottom of a tic-tac box, with a glued-on sequin flower, and a rim made from file folder cardboard. The whole thing is then painted. The crate with the shabby chic label, faded hydrangeas, Spanish lavender plant and gardening book is my gift exchange creation for this year's camp.


The only changes to the side wall include the robin shelter, complete with robin and nest inside with eggs, my CMHH '12 exchange gift creation, and the cat you can just barely see next to the blue fence; she is a repainted resin cat, to resemble our dark tabby cat. The cat is looking up at the robin, who is looking down, and the cat would really, really like to get closer to the bird....


The major changes are inside the shop; I was "auditioning" items to go into the shelves and other displays. Before camp I put together some kits and bits and pieces to make a number of bottles, jars and containers, added some exchange gifts from last year's and earlier camps, and put together a couple of plant kits. Some gifts from my older daughter, chosen to complement this vignette, are also in the display. The purple display rail will get bunches of "dried" lavender, and there will be bins of soaps, more jars and bottles and other pretty things on the empty shelves, and I have to hunt around and find the printies of those wonderful display boxes again - I forgot to bookmark them. Oh well, a good excuse to waste a few hours on the computer!

While sorting boxes the last couple of days, I found more items that will go very nicely into this shop, both in terms of colour and suitability, so more pretty things have been added to the box of things that I hope to fit into this shop.

The shop is intentionally a little shabby; the imaginary owners are using old and new items in the shop, and are doing a lot of refinishing themselves. However, further fixes will have to wait until they have a nice cash flow going. I kind of like the shabby chic shelves against the fancy wallpaper, but will admit there is a lot of colour going on at this point. I am not completely sure about the colour of the table, that may have to be replaced with a more imaginative display area. Something to think about while trying to fall asleep....

Thursday 31 October 2013

Happy Hallowe'en, Everyone!

It's raining here and it's cold, and we have had no trick-or-treaters at all. My husband and I are raiding the candy. I thought I'd say goodbye to October with this picture:


Terry Pratchett's Discworld novels are a favourite of mine, so I've adapted Joann Swanson's Consummate Bibliophile to represent DEATH, who always speaks in capitals. He is winding down with his friend Jack (who lights up and flickers), with a dish of candy and a goblet of wine. They have a 2-man,  mythical-characters-only book club. DEATH has doffed his cloak and scythe (they may appear next year) and donned his smoking jacket and fez. The discussion of their chosen book appears to be quite, uh, lively....

Monday 28 October 2013

Miniature Pawn Shop Project; The Build is Finished

It's been a longer haul than I thought it would be, with my husband taking over the final fitting and gluing. (I threw my back out, making bending over the piece rather painful.) We had dry-fitted everything beforehand, but for some reason things went out of whack when we started gluing pieces together. However, the building portion of this project is now done, all that remains is a little bit of  "set dressing" in the form of moss, dirt, moisture etc. on the cobbled surfaces.


The front view shows the streetlight, the drainage channel in the cobbles, and gives an idea of what the whole thing looks like. We omitted the drainpipe, as there just wasn't room in the alley; the spout would have splashed too close to the building, which would lead to rot, which would lead to the building collapsing - well, I'm speaking as if it is all real, you understand!


This shows the faux wall with its barred door - I think there is something perhaps just slightly illegal going on in that (imagined) building. The three gold balls of the pawn shop sign show up very nicely in thisphoto; they were made of mini Christmas balls, as there wasn't a gold bead to be had in this city, on a purchased wrought iron bracket.


Here is the view in the other direction; the stained glass window in the side wall is visible through the shop window. The display window assembly slides out from between the upper and lower facades, to allow access to the shop interior. The door opens, but human wrists just don't bend properly to get in that way!

Now it's on to tweaking a Hallowe'en vignette, then filling the shop of the CMHH '12 vignette, and then I can start filling the pawn shop. All in all, I am very pleased with how it turned out; I don't know of too many pawn shops in miniature, so this might be quite unique! Oh, and I have to paint the outside of the box and frame it, of course. As the shop space is where the smaller pieces will go, this vignette won't need a glass front, routing out the channels for glass or plexi is always difficult as they have to be so narrow. One thing I won't have to ask my poor husband to tackle this time. I could not have finished this without his help.


Saturday 26 October 2013

CMHH '13 Project Is Cobbled

Well, it was fun googling images all the different types of cobbling used on European streets, and I found a style that would do what I wanted it to do; it is a combination of The Schnoor medieval district in Bremen, Germany; the medieval alleys (steegjes) of Maastricht, The Netherlands; and some British and Scots alleyways and ginnels. So, this afternoon I cobbled the vignette:


There is a drainage channel in the alleyway, you can just see where the cobbles next to the green door go vertically in rows rather than horizontally. There is a treble row of these vertical cobbles, with the middle row being lower than the other two; this is where the water will, eventually, run. The keyhole splash stone will be the next thing to go in that alley, and then the drainpipe will go above that.

The upper façade has been made, plastered and aged, and is now ready to install. The false door and wall, the green door unit and the upper façade unit are still removable at this point, to give me room to do the cobbles and downspout. Tomorrow, hopefully, things can be glued permanently.

My first attempt at cobbles was terrible! I allowed a small section in the back corner to dry overnight, and ripped them all out the next morning. These new cobbles are left-over strips of paper clay bricks, sponged in sections with six shades of watered-down paint, then cut apart, jumbled up and glued to
the base of the vignette box. I had just enough with some to spare to do this cobbled street base. It's a good thing that, like  most miniaturists, I am a pack rat!

The cobbles need to dry thoroughly, then I can seal them, add moss, dirt, and wet areas; my family is challenging me to try and have dried horse dung in there as well, in miniature, of course. I think I can actually figure out a way to do this, finely chopped raffia bits in brown paint with a bit of sand and glue - hmmmm!

Still to be done are the window, handle and bars in the false side wall door, the street light installation, and the pawn shop sign; three gold balls hanging from a wonderful, purchased wrought iron wall bracket. Also, of course, the drainpipe, splash stone and a couple of wooden brackets under the edge of the overhanging second story. I do hope I can achieve all that tomorrow. Other projects are sending their siren calls my way, but I won't allow myself to leave this particular one until it is done.

Tuesday 22 October 2013

Well, I Did Get Stuff Done Today


The left side false wall has been built, clad, aged, and fitted in place but not glued in yet. The half-round windows are in place, and I believe I know what I'm going to do next. The original design had the shop upper façade wall extending over to the left-hand false wall, which really doesn't make much sense, so I will  extend the upper façade out to the left as if it is a jettied second story. This means it will overhang the alley-way but not join up with the left-hand façade. The plan will require knocking out one of the wall supports hanging from the vignette box ceiling; hopefully, I can do it with a minimum of damage to the MDF of the box, as it has been glued in place for some weeks now.

The brown door still needs its door handle, window glass and bars on it, as I'm thinking of it as the back door to a betting shop or something of the sort. I'd really like  to do a bit of a drainage channel in the middle of the pavement between the two shops; that would allow me to create a trickle of moisture effect from the corner behind the green shop door. I don't know if I can fit that in as the doorstep of the green door is low. For a drainage channel to work, the pavement has to slope ever so slightly into the centre. If I do go with the drainage channel, I will put a "lead" gutter pipe in the corner, maybe with one of those key-hole shaped splash stones I've seen in older North American cities. Good opportunity for some algae and moss work on the stucco and the cobbles!

The wonderful Victorian street lamp I picked up will fit nicely on the façade of the false side wall. It's a battery LED light; all I have to do, I am told, is to adhere the metal back plate to my building, and then the rare earth magnets will hold the lamp in place. It came without instructions, of course! There is a tiny switch just on the edge that will face out.

 For fun, I tried doing some decorative plastering, using a large jewelry finding, in the square area above the false door. While this one isn't deep enough to be easily visible, I think I may use some silver Art Deco brooches I have of deer in trees and the like, to make some molds for future use as decorative plaster elements. I have at least one small and one large one, they remind me of gable stones in the medieval streets of my childhood home town, Maastricht, in The Netherlands.

Tomorrow, if all works out, I hope to install the upper façade; once that is done, I can glue the green door unit in place, as well as the false side wall unit. Then it is on to cobblestones, each of which will have to be modelled individually from paper clay. Maybe I can figure out an assembly-line method and speed the process up a little. The cobbles I remember from my childhood were rounded on top, and sort of squarish in shape, so perhaps a log shape that I cut the top slice off may do it. I'd have to round the top off again each time before cutting the cobble off.

 I just may have the "build" of this vignette done by this coming weekend!

Sunday 20 October 2013

Didn't Accomplish Much....

First off, welcome to Beatriz. I hope you enjoy visiting this blog.

With help, I managed to hold a page for the MiniTreasures Wiki Advent Calendar this year, so it will be a learning curve for me to get a photo up. As I am a bit of a computer idiot, I will start on that on Monday, giving me lots of time to sort things out! I had tried last year, and couldn't figure it out, but did save the project I want to feature in hopes of managing to get in this year. Yeay!

Yesterday was my birthday, and one of my gifts was a Breyer horse kit for a 1/12th scale horse to paint and "wig" to my taste. This should be fun, I will have to research horse colours in the period for which I will designate this particular horse. I already have a dapple gray and a bay for my Tudor market scene, although both need the appropriate tack etc. for the period, but this horse may just end up between the shafts of a buggy kit I've had sitting around forever; the finished product could go into my between-the-wars market scene. As a child in The Netherlands, the milkman, baker and pig swill people all came around with horse-drawn wagons, well into the fifties. At times during school vacations I'd be allowed to travel a few blocks with the tradesman and that was such a big deal for me!

Today, I visited an antiques show, and I actually picked up a mini. It is a twelfth scale bisque baby, arms and legs articulated with copper wire, that I will have to dress. In my stash for a nursery shop project, I have a Moses basket, so I have put the poor naked babe in that for now; once the pawn shop project is built, I will do some tiny knitting. Some years ago, an acquaintance who does machine knitting gave me some very fine single ply sock yarn ideal for miniature knitting, and I know I have an old Swallowhill Dolls knitting kit somewhere in my stuff. That nursery shop is another project on my UFO list! Now I do not allow myself to start a new project before finishing the previous one, to avoid further cluttering up my space, which is why I set a deadline for the pawn shop project.  

 Also at the show I saw a twelfth scale beer wagon complete with plastic heavy horses, barrels and driver, but I didn't buy it. And the most fabulous Greenland umiak (Inuit skin canoe) that appeared close to twelfth scale, complete with ivory fittings, harpoons, knives, and ivory and wood oars. Unfortunately, it cost between $500 and $700, so regretfully, very regretfully, I walked away. Has anyone ever made an Inuit miniature scene, I wonder?

My self-imposed deadline for the pawn shop was this evening, and obviously I haven't been able to meet it; we decided on too many structural changes that required re-measuring and re-thinking. So Monday it's back to work on that project, I'll be kind to myself and give me another week to try and get it done. Then there is the Hallowe'en project from a couple of years ago that just needs a little tweaking....

Friday 18 October 2013

Further Progress on the CMHH '13 Project

Yesterday not much of anything got done, time just kept getting away from me. Today, however, I made the half-round polymer clay windows, and paper clayed the back wall.


Wet paper clay is a dirty gray colour, but you can already see the white at the edge where the clay is beginning to dry. The slanted lower wall of the façade is also coated, but this has dried. It does, however, show how a light wash of paint and some messing about with chalk dust can age the paper clay quite convincingly. Once the back wall is completely dry, I'll use a fine sandpaper on a stick to even out the edges.

The two brown semi-circles are the polymer clay window frames; the lower on has had its corner cut off, to fit better into the space. This cut-off will be hidden behind the false wall to come on the left-hand side, which is the next part of the project.

This was the first time I used Premo by Sculpey, and I am not completely sure I like it; I baked it at the recommended time and temperature, but found the baked frames to be kind of bendy, and the corner cut off without any problem at all, using a regular kitchen knife. I am used to quite solid, sturdy baked polymer clay items. I wonder if this result is part of governments' insistence on the polymer formula being changed to meet environmental guidelines.

On to finishing the spaniel on a cushion mat, while waiting for the clay to dry. I have a two-doll commission to start on soon, as well as some embroidered goods to finish off and mail to a client. Then I will probably have to buckle down to some Christmas shopping, as just about everything has to be mailed off this year. A couple of parcels have to go to Europe and Japan, so the sooner the better, I guess!

Wednesday 16 October 2013

Miniature Needlepoint Carpet and Rug

While waiting for glue, paper clay and paint to dry I've been working at making some stock for my show shop; I do the Moncton Miniature and Doll Show yearly, and have gone to several CFB Shearwater hobby shows as well. My stock is extremely low at this point, so I dug out some old books and am re-visiting some fun Victorian designs.


This design is from an old Nutshell News booklet; there is a matching mat with a cat on a cushion. I just love the border of these, very Aubusson-rug inspired. This has now been in the works for four days, and I still have quite a bit of background to fill in. To avoid distortion of the canvas as blocking is a bit of a pain, I do backgrounds in diagonal basket-weave stitch. This rug is either 22 ct or 24 ct canvas. The edging, done in a long-legged cross stitch, is already in place ready to turn the hem. As I suspect all glues of yellowing with age, I sew my rug hems back with a herringbone stitch, which is quite flexible in case the piece needs straightening at some point in its existence. For those of you who don't do needlepoint, the constant diagonal tug of the stitches used may pull the canvas off-centre over time.


This rug, which I made for the parlour of my youngest daughter's dollhouse quite a few years ago, is a large one, 6 x 8.5", not including the fringe, worked on 24 ct canvas. I hand-knot all my fringes! Some dollhouse rugs have a fringe made of a bit of frayed-out fabric glued onto the bottom, and it looks like what it is - hence the hand-knotted fringes. I start them by wrapping floss around a steel ruler, then cutting it into bits approximately 2" (5 cm) long. These are then divided into bundles of 3 strands, and those strands are then looped through the doubled canvas ends using an antique, extremely fine crochet hook. Stick on some quarter inch masking tape, then cut off everything below the tape edge, and you get a very nice, narrow fringe.  It takes time, but  the effect is well worth it for me.

This too is an old pattern; the McCall's Crafts magazine it came from must be from the 80's. As my daughter's Edwardian dollhouse parlour is upholstered in rose and red velvet, this rug matches beautifully. I remember it as being a bit of a chore, repeat patterns can become boring rather quickly.

There haven't been too many additions to the CMHH Project today, just a bit of paper-clay work on the front façade of the building. I have to build up the courage to try and make my own half-round windows. I tried aging the leading on the windows, but only succeeded in making a mess, so that project was abandoned. I suspect the lead tape I am using, which came from a stained-glass store, doesn't react the way golfer's tape does; unfortunately for me, not a single pro shop here seems to have ever heard of lead tape for golf clubs. Well, it isn't a very big city that I live in, after all....

Tuesday 15 October 2013

It's Tuesday - The Lights Are On CMHH Project '13

Well, the interior light is installed. It consists of a nano LED light, held in place by a pearl bead inside a Lucite trumpet-shaped bead, with a bit of necklace chain to hide the wires. This light has a switch on the back of the box, so I don't have to take out the display window every time I want to turn on the light.


The lighting shows up best in the bottom photo (and anyways, I don't know how to remove the other photo). You can also see the stained glass side window, as well as the stained glass transom window, both of which have yet to be antiqued. That requires oil paint, so it has to be done out of doors, perhaps tomorrow. The paper protecting the plexi window in the door is still in place, and there is as yet no door handle - I am going to try and cut my own door plate from some very thin brass I have in my stash, and then try to patina it and the door knob with a kit I picked up.

The door and side wall assembly aren't glued into place yet, as I have to paper-clay the back wall and that is easier to do in a larger space. Before I can do that, I have to build a couple of small windows that will sit in that wall; the original design has half-round leaded glass ones, that kind of appeals to me. I'm going to try making the frame for the windows with polymer clay, and texture it a bit to look like wood. The leaded glass windows will be lead strips glued down to blister pack plastic. The wall behind them will have to be painted black, to hide the fact there is actually nothing there. And I am still hoping to have the construction done this coming weekend.

Oh yes, in the wee small hours of the morning (around 6 a.m. or so) I realized part of the roof of the box is actually supposed to be sky; that has now been painted a pale bluish-gray, and sponged and dragged with a bit of white, to look like a gloomy, it's going to rain type of sky.

I still don't know how I'm going to treat the outside of this box vignette. Help!

Saturday 12 October 2013

CMHH '13 Project Progress - Anton Pieck-inspired Pawn Shop

Because I am changing some of the design, it has become necessary to re-measure and recut a number of the project components. It was decided to drop the front steps up to the shop, as that meant a 6" person walking in would fall the height of 2 steps to the shop floor, unless steps and a landing were built inside. So, we dumped the steps; now the door seems too short for the height of the display window. This is the project up to this point, with the slide-out display window in place:


There is a space above the door that is calling out for a transom window, so that is what I've been working on today. The window will match the stained glass side window, and glass paint takes 24 hrs to dry. As well, for some reason there was no side wall beyond the door posts - just a narrow gap; therefore, a side wall has had to be constructed, papered and panelled on the inside, and beamed and plastered on the outside. It'll be hard to see, but I'll know it's there!

Once the transom and the shop wall are done, I have to move on to the faux door in the left side wall, and a small window or two in the back wall, to give the effect of a narrow alley-way. When that is sorted out and installed, I can continue on the upper façade of the shop itself, which extends over to the left side wall with an angled support beam. Then more paper clay has to be added to the façade, the side and back walls, and the cobbled street surface. Lots of design decisions! I had bought a wonderful double dolphin-head fountain, but as there isn't enough room for it in the little alley, it might go into the proposed apothecary garden project, to go with the Tudor apothecary shop which is in the very early stages of construction.

I'm rather stuck on how to finish the outside of this vignette; the front will likely be framed with half-round timber or something similar, but I haven't been able to settle whether to paint or paper the outside of the box. Usually I just paint, but I'd like to try decoupage with this one. Any ideas?

Friday 11 October 2013

I Promised Photos of My New Dog, plus Camp MiniHaHa Gifts and Tidbits

The sun was shining today, so I took some photos of my dog (miniature, of course) and the exchange gifts and tidbits I got at Camp MiniHaHa '13.


For now, his name is Brutus, and he is a hairy Irish Wolfhound. Brutus was made by Aleeta Kent, of Art Dolls and Miniatures, a real-life veterinarian who is a miniaturist in her free time. Aleeta lives in Grand Prairie, AB, Canada and was a fellow camper a couple of years ago who returned this year with this handsome fellow I had asked her to try and make for me.


One of Brutus`forelegs is lifted, as if he is walking, or perhaps the better word would be, loping along, long and gangly just like a real Irish Wolfhound. He has pads and claws on all four feet!


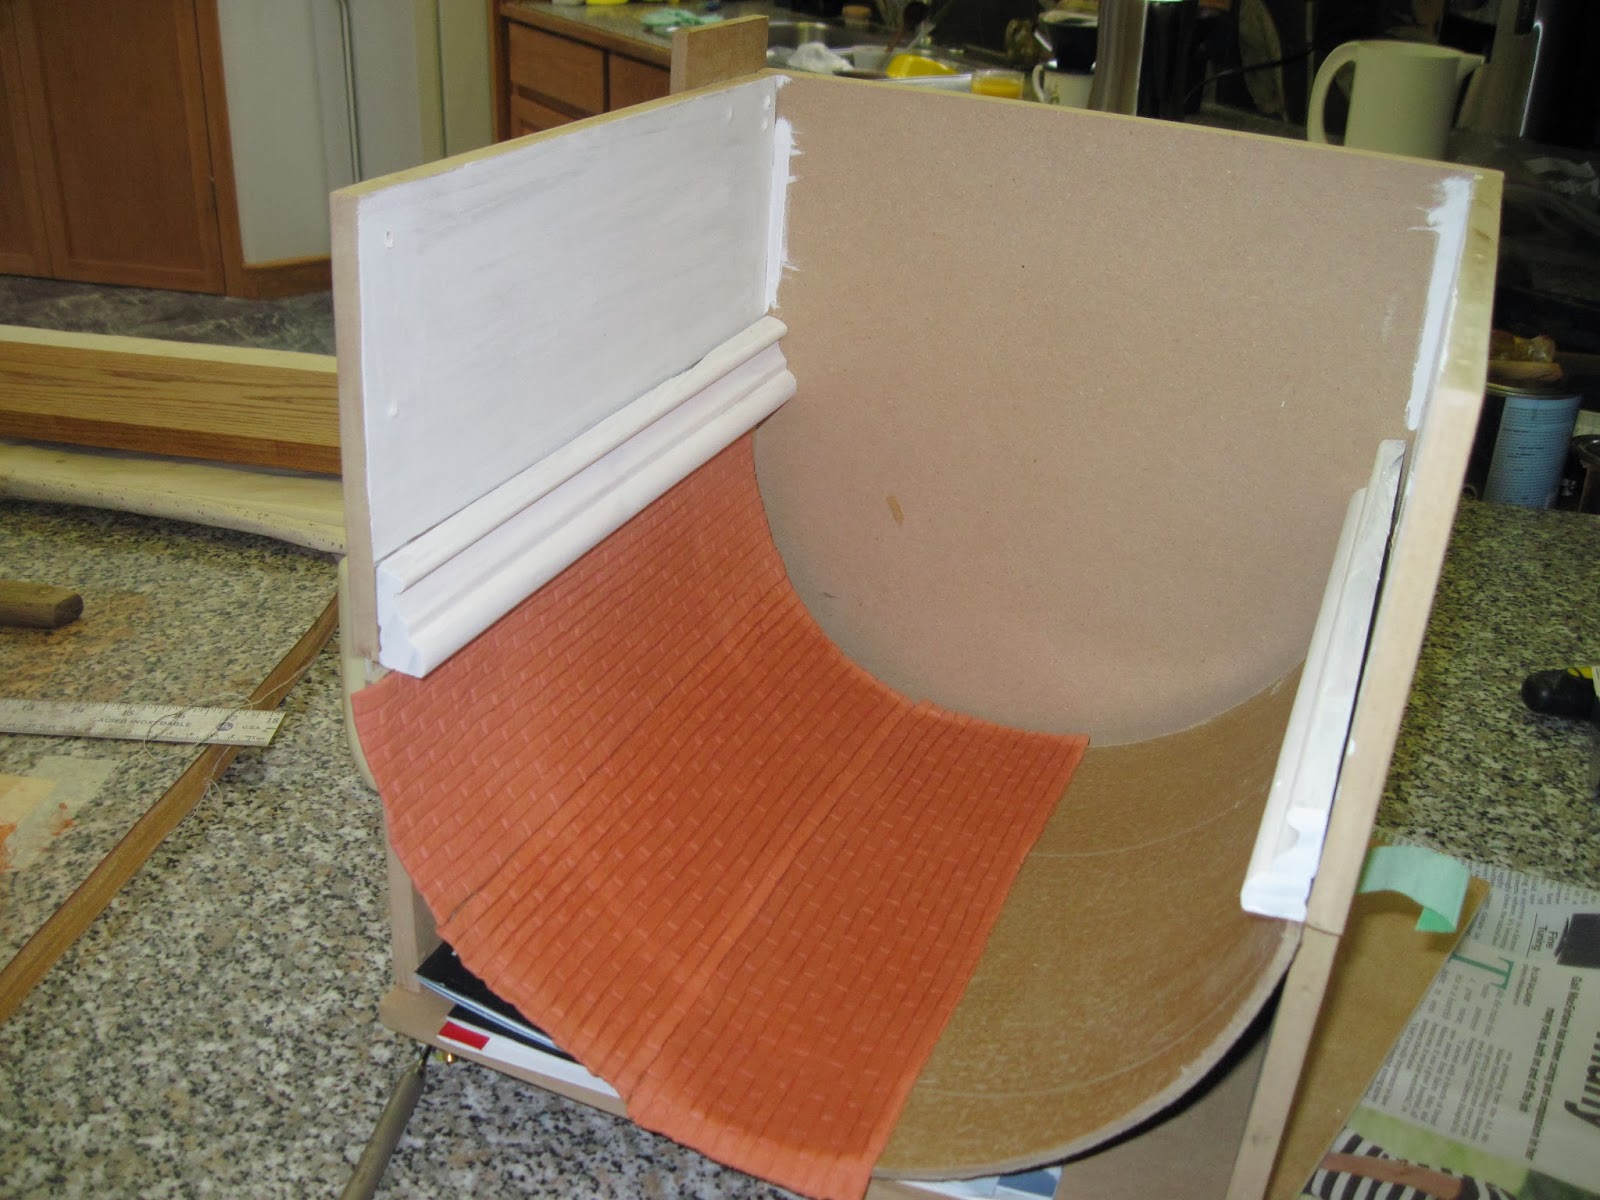
You can just see his claws on his lifted front foot. All four feet are slightly brown, as if he has been walking in the mud, and he also has some brown around his muzzle, perhaps he took a drink from a muddy puddle along the way. Irish Wolfhounds are one of my favourite dogs, unfortunately I will never own a real one, but Brutus is a good replacement - never needs a walk! He will go into my Tudor Market scene, once I have finished and dressed his master. Brutus is covered with natural wool `fur` in several shades of gray, one of the main colours of an Irish Wolfhound. I love him!

As well, I had promised photos of the gift exchange items and tidbits I got at Camp MiniHaHa this year. Each day at lunch, we get a bag of tidbits, little goodies each camper makes or buys. The photo below is of these tidbits:


The range is amazing: a roll of excellent printies, a bag of small tools, a bag of landscaping materials, lipstick and nail polish on a tray, perfumes on a tray, a melting pearl snowman, a stool, a lavender and a succulent plant, a pink chick in a basket, a tiny basket, watering can and bucket combo, a pin, a readable recipe book with chocolate recipes, a shirt, a fire extinguisher, a YSL attaché case, terra-cotta vase, handmade ceramic bowl with kitty kibbles and a printie for a cat treat box, cookies, a fly swatter, a kitchen witch, a cake, a robin with its nest and eggs, a Jane Austen bonnet and parasol, magazines and candles, a small quilled bowl, a  hobbyhorse, a suncatcher, and a wooden open and closed sign . Whew!

And then we have the exchange gifts; these vary for all campers, each evening after supper we draw names. Each camper who participates in this event brings 5 exchange gifts, so you go home with 5 different items, and everyone, of course, ends up with different items.


So this year, I came home with a ladies` fancies set, with the loveliest little necklace, hatbox, boxed set of shoes and a letter, most of which will end up in last year`s camp project; a spokeshave bench, which will go into the Tudor Market scene; a complete s`mores set on a cutting board, with extra marshmallows and a chocolate bar; a fish-pond in a garden; and a yummy cake and a tassel angel in a shopping bag - the cake will go into my between-the-wars market, and the angel will go into the projected Christmas market stall. We all oooh and aaah at the gifts each evening, and deep in our hearts wish for ones that particularly speak to us, and to be able to work them in a scene is a double gift. Sometimes, these exchange gifts are the spark for a whole, another project!


Thursday 3 October 2013

Working Away at the CMHH '13 Project...

...with nothing much to show as it included fitting the window display shelf, and the two window frames. So, I will put in a couple of photos of the campers at this year's Camp MiniHaHa hard at work. Our new work space this year was very bright and spacious, so we kind of spread out. Also, we had a tool room with a tool operator handy right next door; most of us made several visits to Wayne's World for precision cutting as we changed our projects from the prototype - well, truth to tell, we all rarely work an exact copy, we are all too darned independent!


The prototype was rectangular, and many worked in that format; however, as I said, we are all very independent, so a number of people worked theirs in the vertical, creating a two-level streetscape rather than a single-level one. We were working with gator-board, which takes quite a bit of sitting for the glue to dry. Many people also used bricks to clad their walls, these also took time to dry. No one actually finished their project in the four full days of work, but we all developed our idea to the point where it would be simple to finish the box at home.


Here you have a group of campers intently watching a demonstration on aging techniques, and how to add variety to the brickwork. In the background, you can see a version of the prototype with its front wall removed, allowing you to see the inside of the box. The wall is propped below. The demonstrator is Iris S., one of the organizers of the camp.

Camp MiniHaHa is a not-for-profit camp held at the end of each September in south-western Nova Scotia, Canada. Most of our campers are returnees, one of our US campers (hi Audrey!) was back for the third year in a row, and this year we also welcomed two campers from the Spokane, Washington area and two from Wisconsin. The rest came from the Canadian provinces of Alberta, Ontario, New Brunswick, Nova Scotia and Newfoundland. This was my twelfth year at camp, I think; I've only missed one year, very early on. We began with 10 ladies in a summer cottage on the cliffs above the Bay of Fundy, moved to the old United Church Camp in Berwick, NS with 25 people, and are now in the Digby, NS area with up to 40 people. Our campers have come from as far away as Hawaii, California, Montana, Missouri, Maryland, Manitoba, a northern Alberta bush community and a remote sub-arctic community near Hudson's Bay, as well as the UK.

If there is nothing spectacular to show on my camp project in the next couple of days, I'll share some of the treasures I collected while at camp; we have a goody bag at lunch each day, and a gift exchange each evening after dinner. As well, I got a wonderful dog I had commissioned, which I am very eager to share with you.