Showing posts with label Wooden Shoe Factory.. Show all posts

Wednesday, 22 March 2023

Finally, Working Again!

 It has been a very dry period of getting any minis done, as we have had to cancel our weekly get-togethers for a month or so. Marilyn of Charminis was suffering from mini withdrawal, so although our other co-mini-ist Louise was unavailable, we just had to get together.

I had the good luck over the weekend of finding a bag of small plastic Easter eggs in a charity shop, an item I'd been looking for for a while, as I needed them to make lampshades for my wooden shoe factory.


I used the rounder end of the plastic eggs, but as they had a thin rim on them, I cut narrow strips of cardboard (found in between layers of cat food tins), to fill the gaps. The centre was then drilled with my pin vise to create an opening for the wired bulbs, and the hole enlarged a bit with a round rat-tail file. (The upper, more pointy end of the eggs might make good bee-hives, with the addition of rope or raffia to mimic the straw old skeps were usually made of.)


Three eggs have their strips, glued on the plastic with Aleene's Jewel Glue, held by tiny copper clamps. I pre-bend the strips by rolling over them, on my thigh, with the round handle of my Xacto knife.


The egg halves had small air holes in them, which I plugged with toothpick bits or the ends of bamboo skewers; then I sanded them flush to the surface of the eggs with an emery board. The yellow half shows the hole, the green one a plugged hole.  They were then lightly sanded with a sandpaper sponge, and given a coat of multi-purpose sealer. This was then allowed to dry while I had some lunch and awaited Marilyn's arrival.


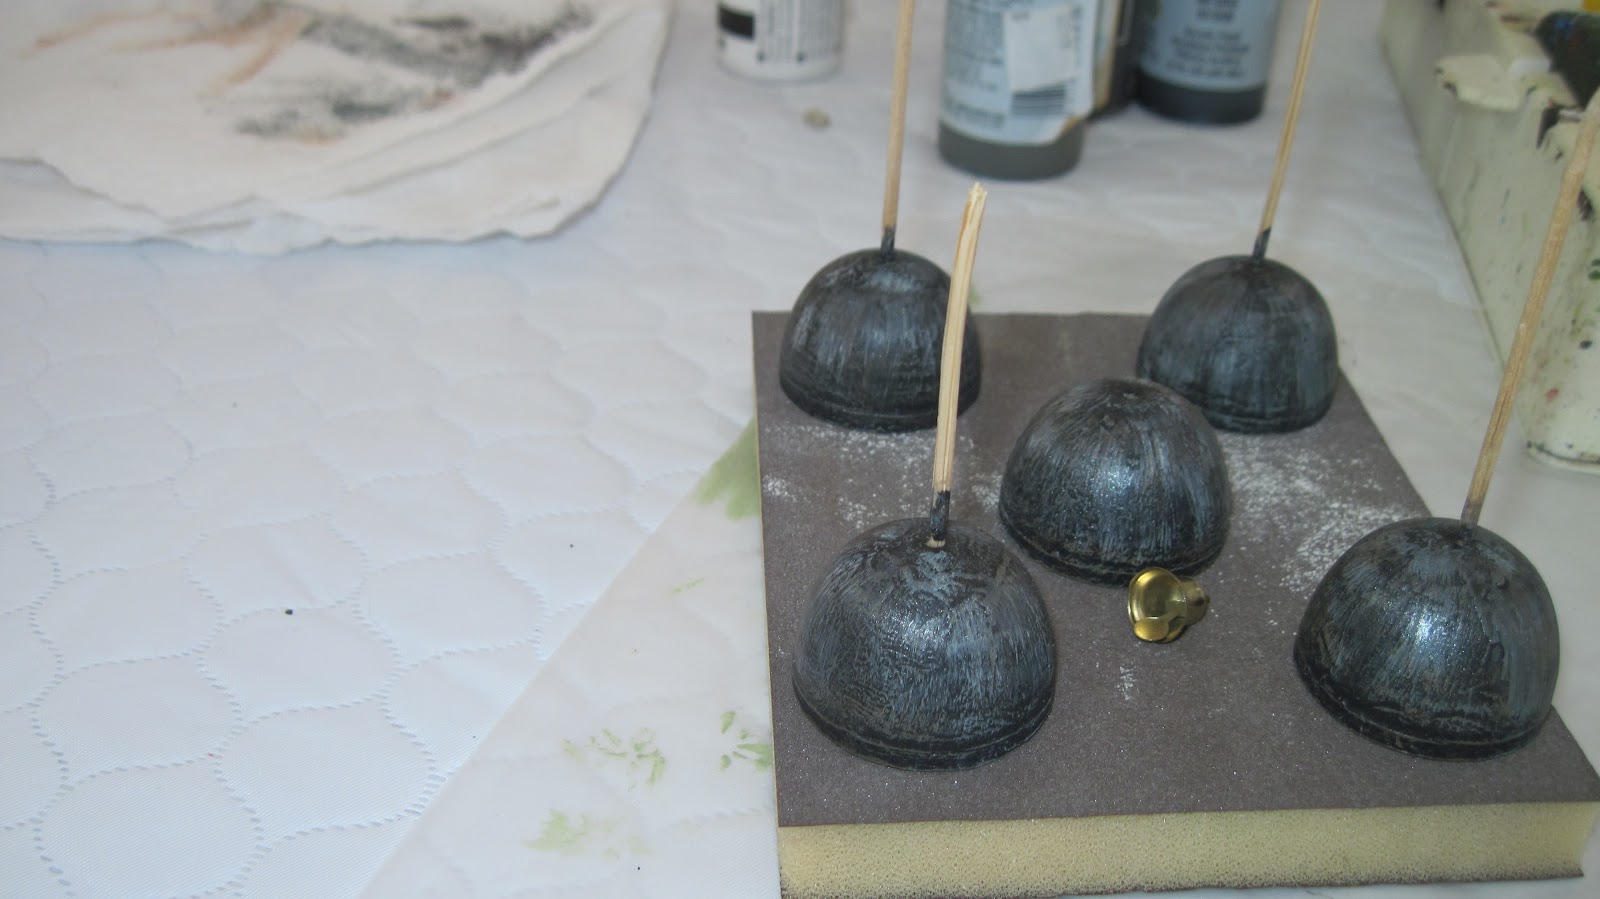
I stuck toothpicks in the eggs to use as handles while painting them. First, I lightly sanded the surface to provide something for the paint to grab on to. The first paint was a gel one, which did not adhere at all on the plastic surface. However, plain black paint covered with no problem. When I first used an Easter egg half to make a lamp shade, we used nail polish to colour them, but I wanted worn, slightly dusty and rusty metal shades, as my wooden shoe workshop is set in the last decade of the 19th century.


Multiple coats of dry-brushed gray, terra cotta, burnt umber and pewter paint resulted in just what I had envisioned when I started the project. The little brass bell will become the top of the shade, just as soon as I found where I "hid" the others....

The last stage will be to paint the insides a dirty white - well, the workshop produces lots of sawdust, coal dust, and so on, so the inside would not be pristine. I intend to use LED lights already on their wires as the light bulbs, threading them first through the plastic shade, then through the aged little bells, and finally through a length of fine brass tube. The wires will then have to go over the top of the workshop and down again to under the stairs, where the batteries will hide. One section of stairs will be removable so allow access to the batteries - I hope!

Now to let everything dry, then I will finish the insides of the lampshades.


Wednesday, 2 June 2021

A Couple of Other Finished Things


We did have a meeting today, and I finished a couple of small things for the wooden shoe factory, like the shovel for the fireplace ashes, and the two-burner hot plate for making tea and coffee. The wire is to become the hose for the propane tank; I have to finish the fittings on that, and then coil this bit of black wire to look more like a propane tank hose.  

Wednesday, 19 May 2021

Making It Look Used


The floor has been finished to look like an earthen floor, and the walls are being aged and dirtied to show evidence of  long-term industrial usage. We didn't have our meeting today, but hope to get together on Monday to make up for it. By that point, I hope to have the aging finished.

At this point, the windows have been fitted but not yet fixed. I need to make the corner wall and the wall with the stove rather more cream in colour, to match the other wall but will have to check it out in daylight to determine just how much colour to add. The bricks need mortar lining and colour washes to make them more realistic.

The paper clay shrunk rather more than I had planned for around the curves of the windows, so I filled in with paper clay "worms"; it wouldn't do to have light showing around the window frames. Soon I'll have to work on the lighting....


Thursday, 29 April 2021

Bits and Pieces and a Door


The "glass" is in the Dutch doors, and the two little L-shaped items in the foreground are the lever door handles of tarnished "brass"; actually, they were made of a slice of dowel and a piece of wood, with paint to make them look somewhat like brass. In my memory, Dutch door handles were always of the lever of the thumb lever type, I have no memory of round door knobs at all!

The log will have a hefty slice taken off, and become the cylinder for the little 2-burner gas cooker on which factory staff can heat water for tea or coffee. The round wooden item with bits of brass tubing is destined to become the top of this gas cylinder. And I did finish a tool, the T-shaped item, which is a pre-borer type of tool used to start hollowing out the quarter section of log that will become a wooden shoe. The other tool-like thing is the spade handle; I have to cut some heavier aluminum plate to make the blade for the spade, which belongs with the wood-stove; it is used to shovel the ash out.

When I was a kid in The Netherlands, we used to use coal ash from the living room hearth on slippery walkways, much as we use sand or grit these days. Waste not, want not! 


Friday, 23 April 2021

A Set of Wooden Shoe Tools


I had begun a set of tools for the wooden shoe workshop some months ago, but being caught up now with other projects, decided to make a few more and "age" the lot.  These are all various knives used in the shaping and hollowing out of the wooden shoes, and I don't actually know their names; they are collectively referred to as "knives". The blades were made from aluminum printing plates, which I begged from a local printing firms some years ago. The metal is thin, bare on one side and coated on the other. As the tools are meant to be hand-forged, they were eventually painted black (and gray and pewter!). 

The handles are cut from hardwood skewers, with holes carefully drilled in the shaped bottoms and through the tops, to run a piece of "rope" through to hang the tools up. The rope loops were made with natural linen thread that has been in my stash for years. It was  a bit of a production to get the loops through the wooden handles, requiring the aid of a needle threader and a crochet hook. I do like the looks of it.  The pencil sharpener is there because I cheated and used it to make the nice little pointed ends of the handles, much easier than carving! The ferrules (rings joining knife to handle) were made of thin strips of card, painted with black, grey and pewter, like the blades, to look like worn iron. The wood was dirtied up with dirty paint water, a small amount of water with a dollop of dark burnt umber paint. They were then finished with a coat of satin varnish.


The finished products are pretty good, I think. Two of the knives are in the little white wall rack, while the other five will hang on the boarded wall. Also in the photo is the little stove that warms the workshop in winter; it started life as a pencil sharpener in white or pot metal, but a few coats of a hammered metal spray paint made it look more "real". I touched up the raised surfaces on the ash and fuel doors with gold wax, as well as the knob on top, to add some dimension to the stove.


Sunday, 18 April 2021

Decision Time!


While working on my trash to treasure project and the floral arrangements recently, I was mulling a decision over in my head, and have decided to go for it. 

Above is the photo in the magazine with the plans, of the wooden shoe workshop I'm building. Growing up in The Netherlands, only one room in our house was heated, and that was the living/dining room. It had a coal-burning unit in the centre of the interior wall of the row of houses we lived in. Our house was free-standing on one side, with large garden there, while on the other side were perhaps four houses with front gardens, while the rest of the row houses on the street fronted straight on the sidewalk. 

It had occurred to me that heating stoves are usually placed in the centre wall of a room; think fire places in North American homes. So why is the heating stove in the workshop right behind the door in a corner? It just didn't make sense to me.

My decision has been to put the stove in the centre of the right-hand wall, and place the wooden shoe painter, currently in the cramped little hallway, by the window to the right of the door, so he'll have natural light as well as heat from the stove in winter. The coffee and tea making table will move to the front of the roombox on the right, on the other side of the heating stove, along with the quartered log sections. That way they can be cozy while having a tea break. So that means that the other equipment, along with the log sections, will move next to the wall dividing the workshop from the hallway. The bench currently in the hallway will move to the stair wall, and there will be some shelves on the interior wall to hold finished wooden shoes. That way, a customer coming in the invisible door in the imaginary
 "front wall" of the box will have a choice of klompen sizes, as well as a bench to sit on while trying them on.

It makes much better sense to me! Now I'll have to see how it all works out in the newly arranged wooden shoe workshop....  

Sunday, 10 May 2020

It Snowed So I Worked

We had almost 30 cm of snow from Saturday morning over into the evening. At 10:20 p.m. last night, the power died; it came on a half hour ago,  around 6 p.m. the next day. I do not remember snow on Mother's Day, ever!

Warning! The photos are auto-messing up, standing on end and not allowing me to flip them.


Part of this paragraph just disappeared of its own accord! The computer is really being a nuisance lately. For my birthday last fall, I got the carcass of another room box, intended to become a model of a wooden shoe manufactory. We dug it out of the workshop yesterday, and I've begun to stain the windows and doors for the building. Unfortunately, part of a window broke off, so it is being reglued and is currently in clamps. The building has a working Dutch door, and half-round windows. It has a lot of interesting features in it, and should be an interesting build.


As I got up quite early this morning, I thought I might as well continue woodworking, so here are a painting table and bench for that "klompen makerij" setting, along with the beginnings of a bow saw that will hang on the wall. The blade is an old jeweller's saw blade, cut to fit. I rebated the components of the saw; as it is 4 mm thick wood that was just a bit tricky. Some wood filler helped fit the second version! There are more pieces to it, hopefully I can finish it tomorrow. The furniture needs another coat of stain to look dark enough, though. And then it needs paint spills all over it!

The barrow has its handles, and the base coat paint is drying. It needs a stand, also a job for tomorrow. Though my sore arm is better, I have to pace myself to avoid painful spells. So far, I am still using stuff from my stash or scrap bag. I need to find my better fancy toothpicks, as the saw blade needs knobs. The one I did find flew into another dimension as I cut it free from the pick. Oh well, the cat will probably find it one of these days!