Showing posts with label Japanese Vignette Project. Show all posts

Monday, 8 August 2022

What I'm - Very Slowly - Working On

 My camera has been fixed, and I can use it again. It was actually fixed for me by a very nice young lady in, of all things, a record store! The mall directory implied they also dealt with cameras, but I was informed that the mall lumps records, videos and cameras together, for some reason.


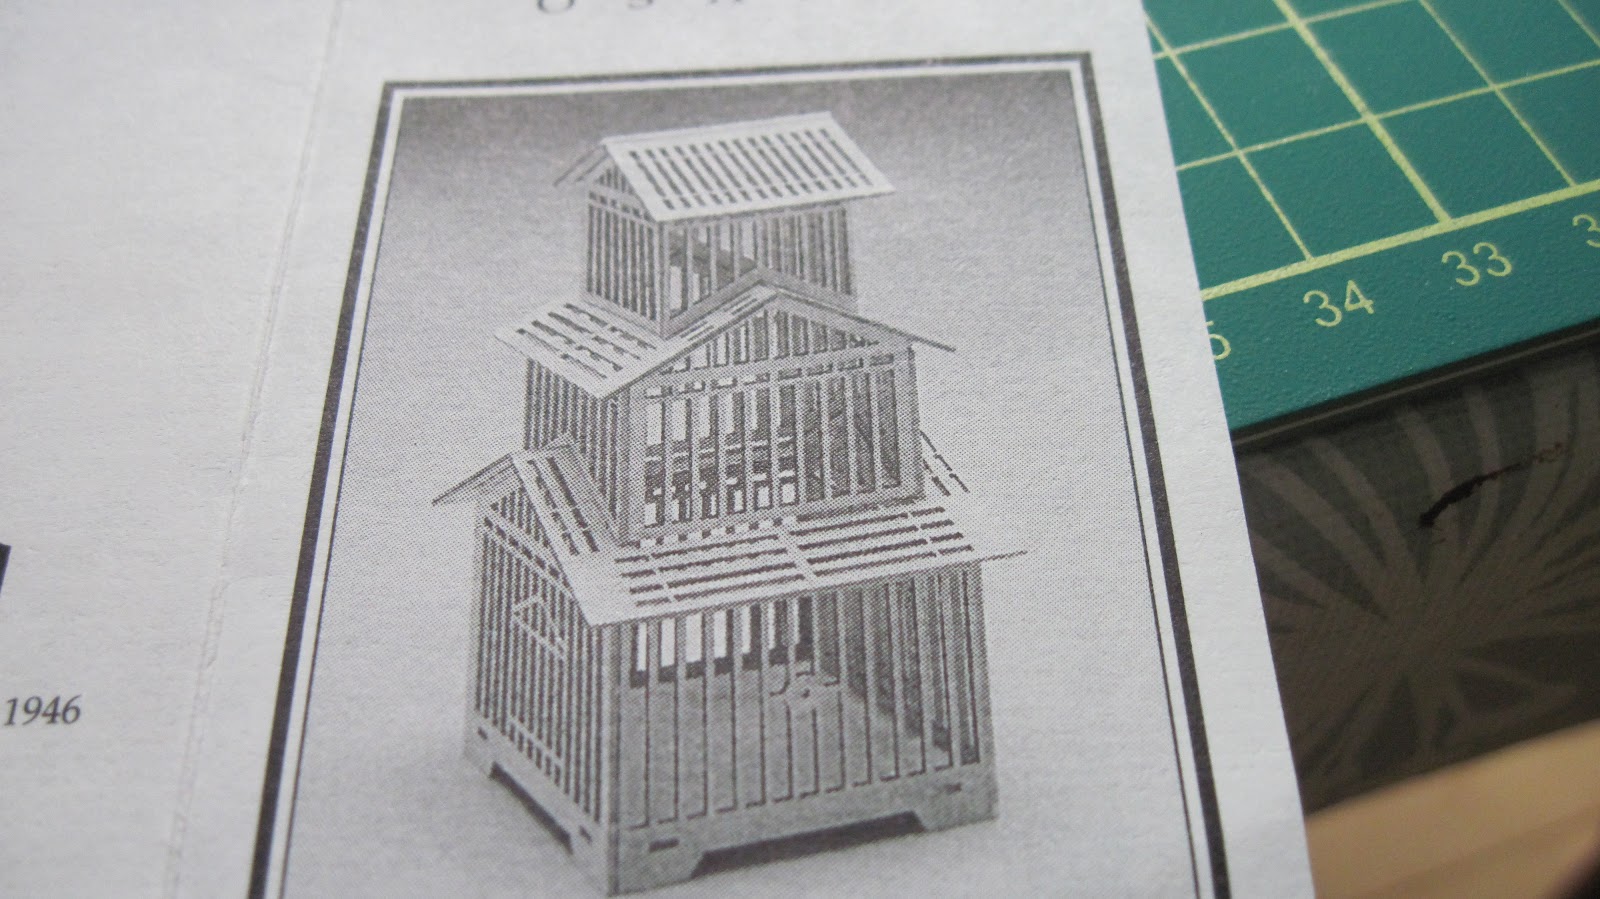
This is a very old, laser-cut kit that was won as a door prize at either the Camden or the Boothbay Harbor, both in Maine, miniature shows, at least twenty or more years ago. It has taken me a while to get up the courage to assemble it, and at this point, I'm not sure who in the family actually won it. Anyway, I hope I can use it in my Japanese Garden room box once it is done.


This is as far as I have gotten; the instructions tell me I must be sure things are dry before I go on to the next step, and with our busy summer so far, I've got half the roof on the first level. I need to decide if I am going to put old newspaper and gravel in the bottom, and that has to be done before the next level goes on. I'd also like to put a bird on the perch, which goes right across the cage, and I'd like both the bird and the newspaper to be Japanese, to fit with the room box's theme.


There are a lot of very fragile pieces in this fabulous kit, and I have to fight the cat constantly to protect the bits that I've already glued! Another (one-day) trip is supposed to happen mid-week, so I hope to do the newspaper and gravel by the weekend, leaving me time to make the bird before our next very welcome visitor arrives, next weekend, for a 3-week visit. Stay tuned!


Wednesday, 9 December 2020

A Little More Done

The Christmas presents are mailed, and the only projects left to be worked on are my own, which should give me a little more time to work on the Wooden Shoe Factory. The inside of the roof of this building is supposed to look like it is thatched, which means adding reeds.


This was the sample I did today; it is a right-angle triangle that will make the roof inside look like a barn roof. The reeding has to be done on the entire length of the roof in the workshop area, so this was an attempt to see if it would work. It did, but I had to adjust the spacing in order to get things to fit into place in a logical fashion. That meant, sigh, taking off the right-hand side of the reeding in order to increase the spacing. The ochre part is the reeded area; the white areas are where beams will be glued into place.


Yes, that was only the reeded roof for the hallway; the long strip is the reeded roof for the workshop proper; I see a great deal of glue being spread upon my fingers, work area, and work apron!


The donor of the "reeds" is this old and used corn whisk; it previously got cut into to make the sleeve fence for the Japanese Garden vignette. Gradually, the corn fibres are being cut out and glued into place onto the wooden block. It will take some time....


Tuesday, 24 September 2019

One Cloud Pine in Miniature


It turned out better than I expected; my only problem is that using matte varnish over scenic cement has resulted in a somewhat shiny trunk. The depth of the foliage is quite good, with a little scatter of several lighter shades just over the top to give some lightness. The evergreen foliage is actually quite dark. Hopefully I can figure out a way to dull that shine permanently.

Now I am off to Camp MiniHaHa followed by a short family, visit until next week.

Saturday, 21 September 2019

Finally, The Cloud Pine


No, it isn't a ghost tree; I put several coats of gesso on the framework of my cloud pine tree, and allowed it to dry thoroughly (several weeks, I procrastinated!), and today, with the last of the floral arrangements for my shop in a box done, I got back to the tree as I will be showing the Japanese vignette at Camp.

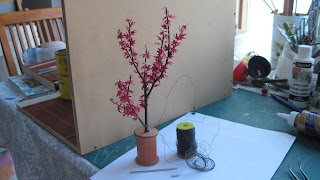
I looked at quite a few different how-to videos, and the one that triggered this idea was a model railroad tree builder from Australia. He uses the coconut liners for hanging baskets to create the frame for his trees, thinning it out and cutting it to fit his ideas. I don't have coconut liners, but I do have a bag of polyester fill for toys; and it pulls out very much like the landscaping fibres you can purchase from the model railroad stores, except that it is white, of course.

I pulled the fibres as thinly as I could, and glued them to the wire support loops. After they dried, I used sludge green paint diluted with water and a soft, floppy brush to brush on the colour. And found that slopping on the diluted colour also allowed me to shape the fibre mats somewhat. This has to dry at least overnight, then I will use spray glue (part of my quilt supplies) to spray the mats and then sprinkle on evergreen-coloured railroad scatter.

Once the mats are covered with foliage, I will likely have to scrape glued-on scatter off the branches and trunks; when that is done, I will paint those with lots of dark grey, brown, sludge green, etc. I do hope it all works out!


This is the last of the floral arrangements for sale; it is a zinc tub of calendulas, or pot marigolds; the petals of these flowers are edible, and look good in salads. I am told they are peppery in flavour.


And just for fun, I made some forsythia and pussy willow branches in vases. I leave for camp on Wednesday....

Sunday, 7 July 2019

The Cloud-Pruned Pine Has Been Re-Shaped


While we were in southern Alberta in May, I spent Mother's Day afternoon in Nikka Yuko Japanese Garden. The garden was designed and is still maintained by Japanese garden specialists, and I got to see some wonderful pine trees there. This one is just off the side of the azumaya (gazebo) at the site.

My Japanese pine will be a single trunk, as my garden is quite a bit smaller; the idea, according to my Japanese gardening book, is that you should be able to see through the tree, so that the areas of foliage look like green clouds, and the trunk and branches should have a pleasing shape. My vignette has the tree in a tight corner, which means I had to shape it carefully to fit; also, it has to leave enough room for the hydrangea bushes underneath to get their sunshine. As well, the branches can't be too close to the (faux) house wall.


The top of the tree will hang over the fence a bit, while the foliage will fit within the corner without getting in the way of the gate or the plants. This is the same tree I put together earlier, with one of the branches cut off and the trunk lengthened. It stands on its own and fits neatly into the corner; the far branch will stand just proud of the slatted side window on the side wall. Next up, I have to prepare the bases for the foliage. Once that is done, I can paint the trunk - right now, it is just floral tape and fine wire over the heavier base wire.

Our heat wave has ended, which means I feel more like working. I hope to get back to this in the coming week, but as it is soon time for my visiting daughter to head home, I hope to also spend some more quality time with her, as it will likely be a year before we will be able to get together again....

Wednesday, 3 May 2017

The Finish Is Getting Very Close

I woke up again around 3 a.m. and simply could not get back to sleep. What usually happens in these cases is that I think, and I think, and so on. Well, maybe something clicked subconsciously, because I went out to the patio at first light and found some really cool rocks.


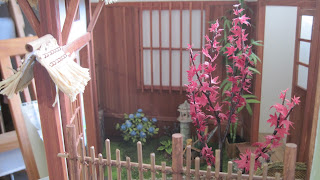
Something was needed for that very dark, right back corner, and there are now 3 very interesting stones sitting in a bed of white gravel, flanked by a hosta and a grassy thing (made of plastic bits!). I also made an area of gravel from the veranda to the hosta plant. That done, I began to plant the hostas in front of the left hand wall, and they are now done. As you can perhaps see from this photo, another interesting rock will flank the gate, along with some mounds of "moss" and a Japanese variegated iris.

The sleeve fence next to the veranda is in place, and has been underplanted with a chunk of foliage and some pieces of another plastic plant. The Japanese maple will be in the space between the fence and the iris, once I get the hole drilled. I am almost done with the ground cover on the right, inside the gatehouse, and have begun with the "dirt" for the remaining hostas in front of the gate.


With the gate in place, you can see that I am very near the finish line. Tomorrow I work, but I may have a couple of hours in the early evening to "plant" the maple, and glue down the walls and gate.
Maybe my brain will allow me to sleep tonight....

Tuesday, 2 May 2017

It's Not Going To Be Finished, But

When I woke up very early Monday morning, I realized that I was starting to get anxious to finish the Japanese Courtyard completely, so I decided, for my own mental health, that I would do as much as I could and exhibit it as a Work in Progress.

That decision made, I was able to finish up two pieces to fill the empty wall spaces in the Shabby Chic flower shop.


The mirror-backed arched window flower box is a miniature of the one across from our bed at the Inn at Fisherman's Cove, in Eastern Passage, Nova Scotia, where the Carpenter-in-Chief and I stayed the night of the CFB Shearwater hobby show. I'd been trying to think of something to display hanging plants, and this one was just perfect to do in miniature. It still needs plants, though.

The arched-top shelf unit will hold plants and flower shop stuff; it was hand-painted and aged to look like an old piece reclaimed from granny's attic. The flower box is made entirely of mat board, with floral wire muntins and mirror card on the back. The shelf is a combination of mat board for the back and sides, with wood for the shelves.

Today I worked on the second hydrangea, and there is a variegated Japanese iris in the making for the corner by the longer fence, which is quite dark and needs lighter-coloured stuff. The spade-shaped things in the foreground of the photo is an attempt at a large blue hosta which may not be successful!
And the painted domes are, of course, bases for garden plants.

So I did a tutorial of sorts for the hydrangea, for which I'll do a second entry. At the moment, the "grass" in the hydrangea corner is drying, so I have a little bit of time.


Saturday, 29 April 2017

Hydrangea Plant No. 1


Seen from the right side, the first hydrangea bush is in place. Why the first? Well, I suspect another one will be needed against the rock wall on the left, it looks a little bit lost there on its own.


As seen through the left-hand fence, there is still a fair bit of space in this corner. I wandered around my mostly dry garden this evening, to see if I could spot a good, twisted twig to become a cloud pine, but have now resigned myself to the fact that I will have to make my own pine tree armature. Hopefully, the dollar store still sells cheap, painted floral wire, because I need a fair bit of it to make a decent trunk and branches. A short cloud pine would fill this corner very nicely, if I can find dark green model railroad "grass", that is. I'll try the store on Monday; it is in a private house, and I do not really like shopping in people's homes.


Just a peek through the main gate....

When I googled Japanese hydrangea gardens, it immediately became obvious that the hydrangea season is akin to cherry blossom season, with masses of hydrangeas and hundreds of people wandering through. Add another day of work to make the second hydrangea bush! And the show is next Saturday.

Friday, 28 April 2017

One Quarter Done


The corner with the water basin and the lantern is now done to my satisfaction. I added a bush (foam ball cut in half, painted, coated in railroad coarse "grass"), a hosta plant, some pinkish stuff kind of the same colour as the Japanese maple under the hosta, and a stepping stone and grass. The grayish things to the left of the lantern are plastic plant parts, as some height in a neutral colour was required there.

Next, I have to make more hydrangeas for the bush that will go in the other quarter of this size of the garden. Five flower heads have been made, but I think I'll need at least a dozen to make a good show.
That's for tomorrow, along with many, many leaves....

Stuff Everywhere....

Landscaping takes time. You can only do a small area at a time, fitting components of the landscape in place, deciding if they work that way, drawing around them so you know where the grass grows, and then the inevitable waiting for a thick application of tacky glue to dry so you can brush off the excess of that darn staticky foam that gets everywhere.


One small corner is more or less done, with voids for where other elements of the design will go. I painted up some very good plastic fern fronds I acquired years ago, and sponged and painted them to look like Japanese painted ferns. I have some of these in my garden, right outside the window beyond my work area, and every year I kind of hold my breath in the hope that they've survived yet another Canadian Maritime winter and its snowloads.


It's a mess! Bits of plastic greenery, paper leaves and flowers being prepared, pieces of styrofoam balls here and there, and I haven't photographed the mess on the floor around my work area; boxes and bags of landscaping materials. In the foam block hosta leaves and variegated iris foliage are drying; I have to figure out how I am going to place these in the base. It will likely involve drilling holes in the MDF and bundling leaves into clusters tied with fine gauge beading wire. The little yellow container is full of printed hosta leaves ready to plant around the front corners of the vignette.

And by the way, there is a snowshoe hare sitting on my lawn, just beyond the trees of the empty lot next doors, chewing at leaves or grass or something. It is partly still white, although the more normal brown summer colour is coming through....


It's the white thing on the grass at the edge of the path....

Tuesday, 25 April 2017

Green Foam Bits Everywhere....

I started some of the landscaping yesterday, and managed to finish getting the gravel onto the walkway.


I rather like the wider strip to one side; this was taken directly from a pathway nobedan I found on the internet. It mimics so-called label stones with crazy paving, with gravel at the edges and in between.

This next photo, despite the flash, is quite dark;


I'm going to pretend it is evening here! The green domes are the beginning of round mossy ground cover, that will go to the side of the lantern. Because so much of a Japanese garden depends on playing off shades of foliage with accents of colour, I am using some plastic plant pieces to mimic various ground covers. It's a good opportunity to use up some of that stuff I've been giving house room to for twenty years.

The grass has been "planted" around the bamboo, and next to the shoe-removing stone by the step to the veranda. It's a very messy job, as everything is very staticky - hence the title of this post. In order to create various shades of green, I'll mix the various colours of railroad foliage I have for the different foliage mounds. Now that most of the snow is gone, I hope to find a good twig - or perhaps I'll have to create one - to act as the trunk for a cloud-pruned pine or juniper, very Japanese and a good foil for the maple, the many hostas, blue hydrangeas, and possibly rhododendrons and Japanese irises. I also need to make a variety of sword-shaped leaves in a wide range of colours.

Which means that I won't be tidying away all the foam for a while yet!

Wednesday, 19 April 2017

I Am Not a Happy Camper....

The walkway's stones are in, I forgot to chalk them so that will have to be done after the fact, and I will also have to figure out how to fix the chalk because I don't think I can spray the vignette without a great deal of masking.

Why am I not a happy camper? Things were going so well. But, I have mislaid, lost, misfiled, call it what you will, the coarse white gravel I used under the veranda of the house. I need that to fill in the gaps in the stones of the walkway.


As I really, really want this finished, I decided to try the dark gray fine beach gravel/coarse sand, but it is too dark for the gravel of the veranda. So that won't work.


So I borrowed some white gravel from a little zen garden I got years ago, but it is too white. That won't work either. I need the slightly grayish/yellowish gravel I used before. There are two more bags of sand from that batch, each finer in consistency and they are simply too fine, too much like, well, sand, to simulate gravel here.

Bah! Tomorrow I work, and then I am away for a few days. The show for which I want this finished is in about 2 weeks....


Tuesday, 18 April 2017

...And Another Photo


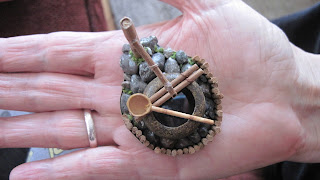
OK, so I'm trying to encourage myself! This is the water basin in my hand....

Front Garden Tsukubai or Water Basin

I had intended to put the Japanese word in italics, but I guess you can't do that with titles.  As indicated Sunday,  today I worked on the water basin, which will go near the front door into the house behind the Japanese entrance garden.


It looks a bit unfinished right here, as the paper band holding the "bamboo" edging is visible; this will disappear once I add the "mossy lawn" to the setting (I hope!). The setting is illustrated in my book, as a Flat Garden, Intermediary Style; I am trying to stay true to Japanese garden design.

The stone basin is a repainted terra cotta planter that I picked up years ago on a yard sale table at a show. It is mounted on two layers of mat board, surrounded by "wet" stones, and has the bamboo pipe and spout behind it. There will likely be some ferns planted at the back of this element of the garden.

 Although it isn't visible here, the back of the water feature has moss growing between the stones; I think this may be seen if you look over the longer side fence into the garden. The dipper is made from manila card and a toothpick, with some faux finishing. The water inside the bowl is a piece of acetate that doesn't quite fit flush, which means it shivers realistically if the base is touched. That is what is called serendipity, I think!

The lantern also got a new paint job; now I have to wait for a sunny day to go outside and spray it to keep the chalk in place. It will also be set into the mossy lawn. After several really nice sunny days the last three have been gray, wet and miserable; we had a little snow overnight....

This morning I had an existential crisis at 3 a.m., probably as a result of attending a funeral Monday for a lady who was at least a dozen years younger than I am. It took the form of wondering if I should continue on with miniatures and other hobbies, or just finish what I have not finished yet and stop cluttering the house with my creations. I hate the thought of these miniatures being put out with the trash when I am no more; I don't know what to do with them when my time eventually comes - who is going to want this stuff? Not to mention the containers of components cluttering up the storage area in the basement. I think I will have to start giving stuff away....


Sunday, 16 April 2017

That Took Some Time For Sure...

...especially with a cracked thumb on the right and a broken thumb nail on the left! Somehow, the ties I was using had an annoying tendency to either get caught up in the broken nail or on the adhesive bandage, which kept rolling up on me.


Do click on this one for a close-up view, it's actually quite convincing. This is the "moss" being applied to the cracks in the rock wall; I have a pet peeve with huge quantities of moss being applied to miniatures, as it completely wrecks the illusion. This is being done tiny bit by tiny bit, keeping in mind how the rain water and shadows of the rocks would affect how the moss grows.


I mix my "moss" up out of three or more shades of model railroad foam scatter, with tiny amounts of yellow and sometimes orange added to suggest flowering weeds in the moss; this is the  finished, mossed wall in progress in the previous photo.


This is what almost drove me around the bend; trying to tie each individual bamboo stake (reclaimed from a window blind sample) to the horizontals between the "cedar" (actually painted dowel) fence posts. This fence is a somewhat spread-out version of real Japanese fencing; it is wider apart because I wanted the garden to be fully visible, as that is the focal point of the vignette. Traditional Japanese fences tend to make what is inside of them invisible.

Now that the fences are done, although still not attached, I can concentrate on the actual landscaping of the front garden. I am thinking of trying to make shallow domes of air-dry modelling compound, to mimic the mounds of moss so often seen in Japanese gardens. Painted green, with the "moss" scatter glued on, they will add some shape to what would otherwise be a flat garden. Within groups of these mounds, I can place the water basin, lantern, and whatever else will fit in the garden.

I still have to re-tie the woven bamboo fence; for some reason, I can't wrap my head around how to get a decent cross-tie effect on this fencing. Back to the books for research!

Happy Easter, everyone. Although the last few days have been wonderfully warm, with blue skies and sunshine, today is overcast, grey and rainy....

Friday, 14 April 2017

I've Got Rocks in my Head....

Today was spent, in its entirety except for a church service this afternoon, making and gluing rocks on the rock garden walls for the Japanese vignette. I am happy with it!


The rocks are a combination of egg carton stones, beach gravel, and wooden cores. Fortunately, the papier mache of the egg carton does lend itself to some bending and shaping when wet with glue. The colours were done with both sponged-on acrylics and chalk powder. The larger gaps between the large rocks were filled in with the gray-brown beach gravel.

Tomorrow, I hope to find the time to add some moss here and there in the narrower chinks between the rocks; I may also have to touch up the wood underneath in a few spots. After that is done, I have to make - and design - the open "bamboo" fencing to bring the garden walls to a proper height, likely around 6 inches (15 cm). Then it's on to the landscaping....

Wednesday, 12 April 2017

Japan Again


Yesterday I experimented with "weaving" my own Korean bamboo fence screen; the raffia was too uneven, the broom straw was too stiff as well as uneven, and floral wire just wouldn't remain straight, so I gave in and painted a piece of coarse, mono needlework canvas, with at least 10 holes per inch, to represent the split bamboo latticework. The broom straw did get used, to make the bundled "reed" sides of the screen; I have to redo the tying, as the knot used in Japan looks like a cross-stitch, rather than a single stitch. This is a very old type of fence, also used in Korea. I'm happy with it.

It was very messy work, bundling the "reeds", I had tacky glue everywhere! Now that everything is firmly fixed in place, I can untie the brown strings and do proper cross-shaped ones. I did look at the particular knot that is traditionally used, but it is too complicated for miniatures....

The fence has legs of heavy-gauge floral wire, that will be glued into holes in the base. I bent the curve around a bottle, then glued the canvas on, on the bias. The canvas was then painted with two shades of straw and ochre yellow, dark brown, and a bit of green, with the bundle of broom straw right next to it in order to have the colours match, using half a dozen coats of dry brushing.

The bases for the rock walls on either side of the large gate have been cut, and painted with a sponged on mortar coat, 4 colours of paint. Most of this will be covered with egg-carton stones, but painting it beforehand means I don't have to worry too much about mortar gaps between the stones. Once they are in place, I will add bits of moss and algae to the stones of the wall.

On top of the wall I want to put a "bamboo" fence that will allow you to look into the garden; this is definitely not traditional, all the photos I viewed have the garden wall high enough to completely hide the garden. As the garden is the main point here, I am creating my own, Japanese-inspired design.
Friday, 3 March 2017

Working Away, But It Takes Time


Applying many coats of paint, and then waiting for the crackle finish to get really dry, does take time. In the time in between working on the door and window components for the FAME club project, I've made a few more potted plant leaves, and begun the hydrangeas for the Japanese vignette. That one is now in the throes of landscaping; first you paint all the lawn areas green; check, and done. 

On reading my book on Japanese gardens, there are a lot of rules to follow. Everything down to the tiniest detail seems to be laid down by master gardeners, and the plans have been in use, virtually unchanged, for centuries. I really, really love the Korean bamboo fences in the book, but couldn't figure out where I'd get stuff thin enough to bend, that looks like bamboo. Well, the light-bulb lit up. and I am going to try corn broom straws; they are the right colour, and I think that if I soak them and bend them around a jar or can, I can make nice rounded bundle fences.

There should be a small fence near the front door; the water feature, in my case a hollow "stone" with a dipper, needs to be next to that fence. There needs to be a shoe-removing stone in front of the step to the house. There are several interesting types of walkways that I can build. The lantern also has a specific place in the garden. Alongside the front gate, there will be fences, perhaps on "stone" bases, with bamboo tops. These should allow a glimpse into the garden and its flowers and plants.

And of course, lots of photos to study in the meantime, too. Surfing the internet is a good way to pass the time while waiting for paint to dry....

Friday, 24 February 2017

Sometimes Stuff Breaks....

The gate to the Japanese vignette is finally finished, but it apparently fell onto the Japanese maple tree. While showing that one off recently, we discovered one of the tiny branches had snapped. I needed that branch to bring shape to the tree, so I thought and thought and came up with a way to fix it that I think worked very nicely:


In my stash of stuff I have a spool of very fine wire, vintage stuff likely used when people were doing wired bead flowers or something. I wound a length of it around a thick tapestry needle, making a coil, then glued the coil onto the branch stump. Then I glued the broken portion into the top of the coil, and glued on some leaves to hide the repair. It is the right-hand branch at the top that was repaired, but the repair is nearly invisible.

In rescuing the tree, I managed to catch my rather large ring on one of the slats over the window in the vignette, and of course it snapped off.  That repair was somewhat easier:


Yes, the vignette is on its side! Only a few pieces of the gravel I had glued down a couple of weeks ago came loose, so I guess they're fairly firmly in place. The can and glue bottle are acting as the weights. I am going upstairs to eat lunch, so I don't fiddle with my repairs....

Monday, 13 February 2017

Buildings and Blizzards

For those of you who live in more moderate climes, I am including a couple of photos of our house, taken just a few minutes ago. We are in the middle of a severe  blizzard with heavy winds (80-100 km/h, and severe flood warnings out for coastal areas. Fortunately, I live several hundred feet above sea level, and more than 90 km from the nearest ocean.


This is the view from our kitchen window, out towards the street; the snow is beyond the windowsill, and we have 4 steps up from the street level to the kitchen. The trunks of the apple trees are completely buried in the snow.


This is the view from my work table, in the lower level of the house; the drifts are coming from the patio and blowing up on the retaining wall. I measured the level of snow in front of the door, and at its lowest point, it is 70 cm deep (27.5"). All three house doors are currently blocked by snow, and the snow isn't over yet. Another storm is being forecast for Thursday. (The wind just shrieked so badly that the cat jumped off my lap in a panic!)

However, I have been working on the Japanese vignette; the photos below are of the sewing process for attaching the thatch to the gatehouse roof:


And here is the more or less finished product. I still have to glue the bamboo ridge beam in place, and I think it might need a bit of tying to hold it down properly. Some small angled beams will be added under both roofs to act as supports. And I may have to glue down the odd fly-away "straw" from the roof as well.


That's it for now. I can smell dinner cooking, and I desperately need something warm inside of me to take my mind off this miserable weather!