Sunday, 5 June 2022

A Couple of New Plants

 Among the items in the things from our mutual miniature friend was a punch for split-leaf philodendron leaves, so I had to try it out, of course. But first, paper needed to be painted, as I'd gone through almost my entire stock of leaf paper. Marilyn was putting together a fuchsia kit here Friday, so I painted on the other side of the breakfast bar. 


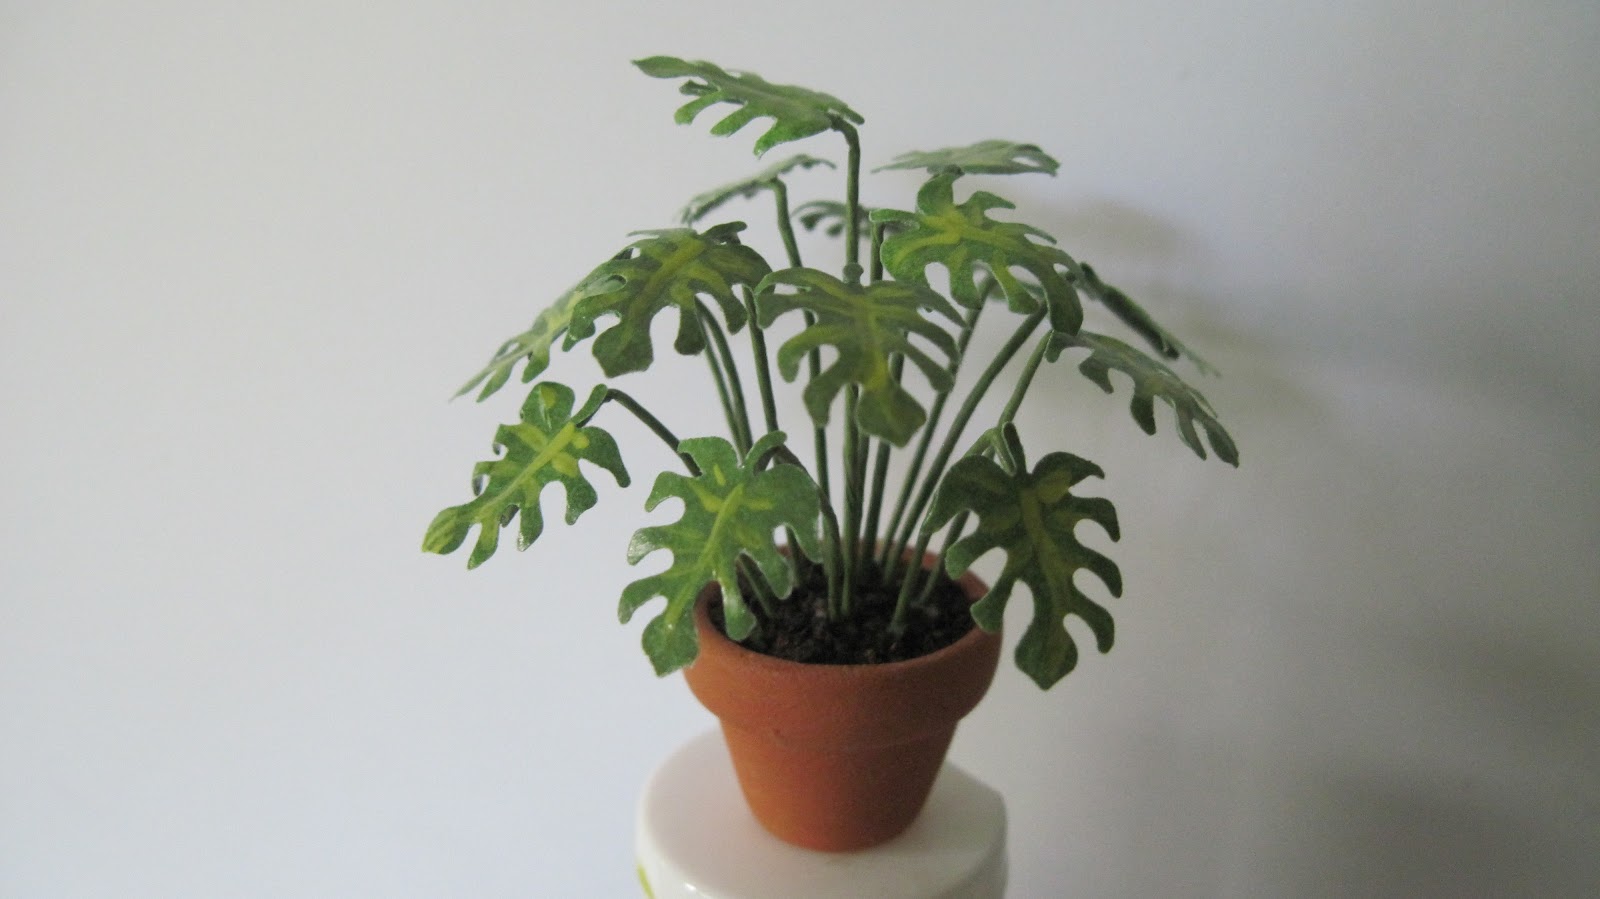
I do like the leaf, but wish I had more than one size; the more sizes of leaf one has, the more convincing the finished plant. This one is intended to go into a planter, which has disappeared - and I'm blaming the cat, who has been batting around every tiny thing she can find! I think she may be heading into a sort of second kitten-hood, as she is 12 years old....

I mentioned a pansy kit; the finished product is shown below. I found I prefer my own method, and there were some things about the kit I rather didn't like. For one thing, the paper is very soft, and didn't take well to my colouring pencils. For another, the pot had plasticine stuffed into it, so the oil in that got into the wood, which will not take paint now. I did the best I could, adding a wee bead of orange paint in the centre of the yellow to add a bit of depth to the flower. (A better thing to use for "dirt" in miniature plants is something like Crayola Model Magic, an air-dry clay that takes paint and glue very well!)


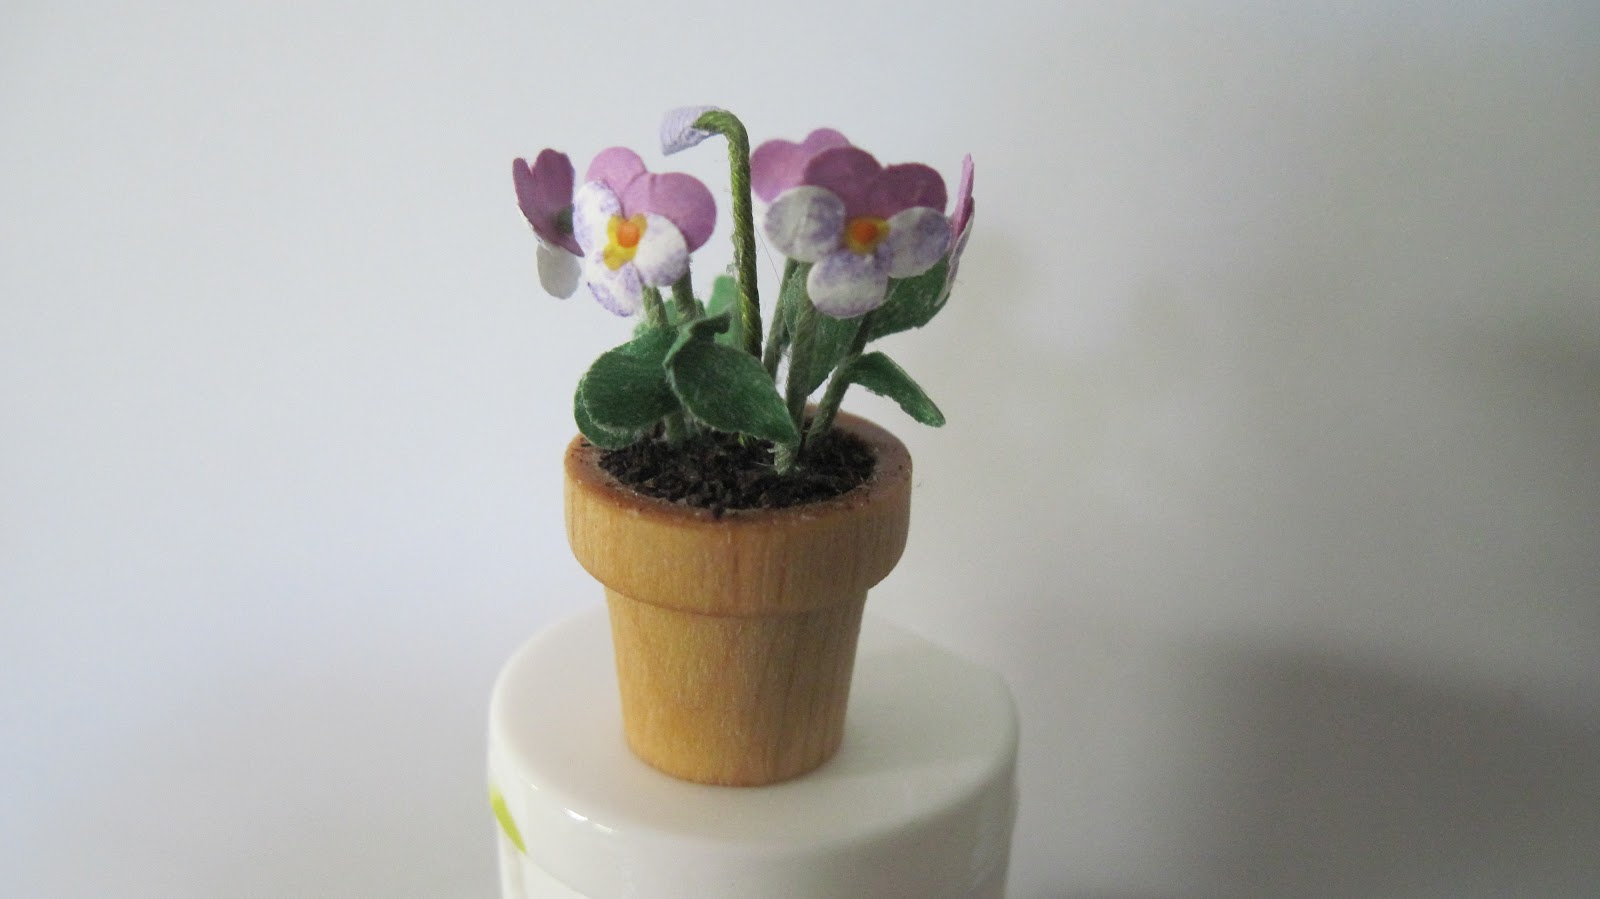
There were only five pansies, so I added a bud. The kit had absolutely no room for mistakes; five heart punchies in purple, fifteen teeny white circles, ten leaves, and five 1" (2.5 m) stems. When I've taught flower making, I've always included practice punchies and longer wires, for those inevitable mistakes newbies  tend to make....

I'm still experimenting with the lily and Schefflera kits; my conclusion at this point is that I should quit while I'm still sane, and see if I can reproduce both of these very well-designed plants with some of my own paper. (I do believe I still have a Hanky-Panky lily kit that I've never assembled.) The laser-cut pieces of the lily and Schefflera are perfect, especially the lily stamens and there are some punches in my collection that I may be able to trim to the desired shapes - except for those marvellous stamens; they could only be made with a laser cutter. 

My younger daughter arrives this week for a nearly 3-week visit, and the day after she arrives, the Carpenter-in-Chief and I have to drive to Quebec City, for a funeral delayed due to Covid. We'll drive the day of the life celebration, stay overnight and head home on Saturday, and our daughter can look after that darn cat while we're gone! She will likely use my car to visit her best friend not far from here while we're away.

Friday, 27 May 2022

An Experiment in Rehabilitating Paper Plants

We did some more sorting of our mutual friend's miniature stash, this time we dealt with landscaping materials and a variety of flower-making materials. Among the stash were a number of plant kits, very well done laser cut kits, that Marilyn and I shared as Louise is not about to try making plants when she knows people who can make them for her....

One kit had been finished, but in the moves and with the packing, it had suffered; that one was easy to fix, as you can see below:


This is a gorgeous caladium kit. When I got it, there were several bare stems, and a stem with a leaf that was just in the box. While sorting, I found the missing leaves, so they were duly glued back on to their stems. The stem with the leaf was replanted in a bare spot, and two stems that were too tall were cut short and now look better. Easy!


These are most of the stems and leaves for a Schefflera (Umbrella) plant. The paper used is much softer, and the baggie in the foreground contains some of the leaves that had come off the laser cut leaf rosettes. I've more or less repaired the leaf at the extreme left, strengthened some of the very tiny ends of the leaflets with a dot of tacky glue, and given the leaves some shape. The larger leaf rosettes should have nine leaflets, while the progressively smaller ones have seven and five. All of them need strengthening and shaping or re-shaping. This one is rather more of a challenge....


I don't know about this poor thing! There should be at least seven lily stems, but this is all that was left. I can probably re-do the petals by trimming a similar punch I have, and there are lots of leaves yet to release from the laser-cut sheet. But, I don't have the stamens, which are very delicate dots on the end of tiny stems; one is all that there is on the bare-looking stem. The leaves on the finished stems are placed rather too close together, and I am not sure sure how I can get those off; I may have to carefully cut each leaf rosette off the stem, and then carefully glue it back in a better position. Again, the leaf paper is very soft, and therefore very fragile. Sigh! I love these lilies, and would very much like to make them "come alive" again.


The hydrangea kit hasn't been put together, but I found the tiny blue blossoms everywhere while tidying up! I hope there are enough to finish the plant. Everything but the wires were present in this kit, but I have lots of that kicking around. The iris kit is complete, made in a different way from my technique, and I'm interested to tackle it.


The last kit, by a different manufacturer, is a pansy kit. Again, this kit uses a different technique from the one I use, and I do want to add some additional colour; the kit has little purple hearts and tiny plain white circles for the flowers, and they will require some additional colouring work to look good. This one came with a pot.

All the kits came with their own "dirt"; I use unused tea leaves, so I'm interested to see what the dirt in these kits is made of. I am not sure if any of these kit makers are still producing flower kits. One of the kits Marilyn got is a fuchsia, and I'm very curious as to the shape of the flower parts the designer of the kits used; all the magazine and on-line instructions I've seen make flowers that are rather out of scale.

I do have some kits in my stash that I haven't made up yet; another UFO project, some day!

The last container of mini stuff we have to sort through is a heavy load of polymer clay....


Thursday, 19 May 2022

Now Where Did I Put My Heart Punches?


I actually started this physalis or Chinese Lantern plant a week or more ago, but have somehow managed to lose all of my heart punches in some weird place. However, during our sorting process of a friend's stash, there was a triple heart punch the right size. Just one small problem, the actual die-cast punch part is in the plastic housing the wrong way around. This means punches have to be extracted from the works with tweezers. Things can get a little complicated, sometimes....

However, yesterday our meeting did not happen due to other things, so I decided to work on the plant. It is in a pot because, although very decorative, it is also very invasive! The original instructions came from a Jicolin Advent Calender in 2011, by Minipat, a French blogger. She used tissue paper for her flowers, which I usually replace with coffee filter paper. The backwards punch would not punch this light paper, so I decided to use computer-weight coloured paper instead. The flowers are made of a seed bead in the colour of the flower, glued to a stem. Two hearts are applied points up, and when they are dry, two half hearts are glued over the sides of the "heart sandwich".  

As my paper was stiffer, I creased each heart down the centre and then rounded out the lobes of each heart. The half hearts are also rounded out before being applied. Although not entirely successful - the seed bead shows in some places - I am pretty happy with this version of a Chinese Lantern in miniature. It would look good in miniature "dried" flower arrangements. along with lotus and milkweed pods, which I have made in polymer clay in miniature....

We miniaturists are sort of crazy....


Wednesday, 11 May 2022

Things Are Being Sorted Out....


...in more ways than one. I am NOT making furnishings for this loft corner yet, but helping friends go through years' worth of mini stash did turn up that Gothic window at the left; I had seen a rather spectacular steam punk hall tree while browsing for inspiration, and it needed a Gothic window sort of thing. There were three in the stash we were sorting out, so serendipity strikes again. It is quite an inexpensive laser-cut plywood window, and I made it more useful for my purposes by carefully cutting out three further, horizontal bits to open up the base. The finished product will actually sit at this level or very close to it.

For those who are new to this blog (welcome to my new followers!), the furnishings in the photo pre-existed the actual creation of the corner vignette, except for the radiator. The chair and rug gave me my colour scheme, and the tall black table with the vase on it will be my take-off point for making the hall tree. I'd also like to make a side table to hold wine or coffee and a book, and who knows what else will be created, in black and whatever I find that will add to the steam punk look!

Last Wednesday afternoon was sorting, and this afternoon will be spent on doing more stash sorting, as Marilyn (Charminis) is currently housing all the containers and needs them out of there. Who knows what other odd and interesting items will turn up? I rescued two tiny, tank-like things from the garbage last week that will serve very nicely as air tanks or other weird steam punk stuff....

Thursday, 5 May 2022

Working Away Rather Unspectacularly....


 One of the UFO's from my previous post has been worked on. This is a re-purposed industrial,  steam punk loft corner, with two floors, that was a Camp MiniHaHa project some years ago. One of its more interesting components was a spiral staircase; well, it has driven me to the point where I've decided to do away with it altogether - I just cannot fit it realistically into the space I wanted it in!

What has been done is that the building carcass is now glued and pinned up, which means I can begin plotting the lighting; there is a purpose-built false roof to hold the batteries for the LED lights. Yesterday, while helping clear out a stash of  a friend's miniature materials, I found some small brass bells, which make great tops for industrial lights, and that is what this vignette is intended to get. I have some wonderful textured brick paper for the outside, and will do the roof as verdigrised copper, as originally planned, with a faux finish on card. It will look rather like the roof of Floriana (q.v.) but I'd like to drag some verdigris drips down the walls here and there....

With the re-thinking of how this will go, I've come across some interesting steam punk ideas for furnishings, and have decided to be smart and finish the building itself before I start on the furnishings; I always make way more than the space can hold. It will be a corner of a two-story steam punk loft apartment for the owner (female, as far as I know!) who owns the book shop in the books, also a steam punk project from Camp. I'm heading towards a lot of dulled copper, as I'm working with a very autumnal colour scheme, for the pipes against the cream-coloured walls, and also want to put lots of art work on those walls.

Thursday, 21 April 2022

Good Intentions and Certain Roads....


Spring has sprung, and the St. John River is giving us its annual flood. I have bright yellow crocuses up in the garden, the first of the new bulbs planted last fall, and I hope the others we planted do as well. We also had our first real guest in two and a half years, so maybe things are getting back to normal? We are expecting our younger daughter to be with us for nearly 3 weeks in June, and our older daughter is planning a visit in late summer or early fall. Our son's ability to travel has much to do with his work load, but he too is hoping.

The photo is of at least 3 of the UFO's (UnFinished Objects) in my house that are trying to make me feel guilty, but I have, in fact, been finishing up UFO's in my other hobbies. My sewing machine and serger needed some work, and for that we had to travel two hours up the road to find a qualified repair person. 

Our little mini group of 3 has been getting together, and little things have been worked on, but not enough work has happened to make it worthwhile to share with you. However, hope springs eternal, and I do hope to get at least one of those projects DONE soon!

There is, however, some springtime garden maintenance that needs doing, removing piles of wet, rotting leaf mulch from all the flower beds, and as our days seem to alternate rain with sunshine, so it may be a little while yet....

My intentions have actually been good, but the carrying on is sometimes harder to achieve. Thank you all for sticking with me, and do stay tuned to encourage me to keep on going on!


Friday, 11 March 2022

Just Checking In!

Since the  Russian invasion of Ukraine, I've been unable to concentrate on much, and have spent far too much time reading or watching news programs. Some years ago, I sponsored a boy in Ukraine; Olek is now in his mid-teens, and I worry about him and his family. They became eligible for sponsorship because the family were internal refugees following the 2014 annexation of the Crimea.

I have done some mini work, but it is not really worth blogging about. But on Monday night, when I just could not sleep, I took photos of a fairly unusual house-plant bloom. At least 25 years ago, I purchased a very large old Sanseviera (Mother-in-Law's Tongue or Snake Plant), at a yard sale, split the thing into two separate very large flower pots, and both of  them now bloom regularly. I was told that the plants have to be quite mature to bloom, and mine are well over 30 years old!


This is the living room plant, the other one lives in our sunny front hallway, which has lots of south-facing windows and a terra-cotta tile floor that captures the sun and heat from the skylight. The flowers are night-blooming, and are likely pollinated by bats and moths. When we lived in Jamaica in the early 90's, I'd regularly smell this incredible scent at night. I discovered that it was sanseviera, which is often used as a hedge in there. The scent is like orange blossoms or jasmine, very lovely, and comes in waves.


The blossoms are very delicate and beautiful, and grow in spikes. They also produce a lot of nectar, so the plants have to be kept from walls and furniture, to prevent the nectar getting on walls and upholstery. As I was sitting in the living room, drinking chamomile tea in the hope of getting some sleep that night, the scent came and went, just gorgeous.

I hope to get some mini work done this weekend, as I'd really, really like to call the Christmas Market Stall finished.....