Friday, 26 May 2023

Working Away....


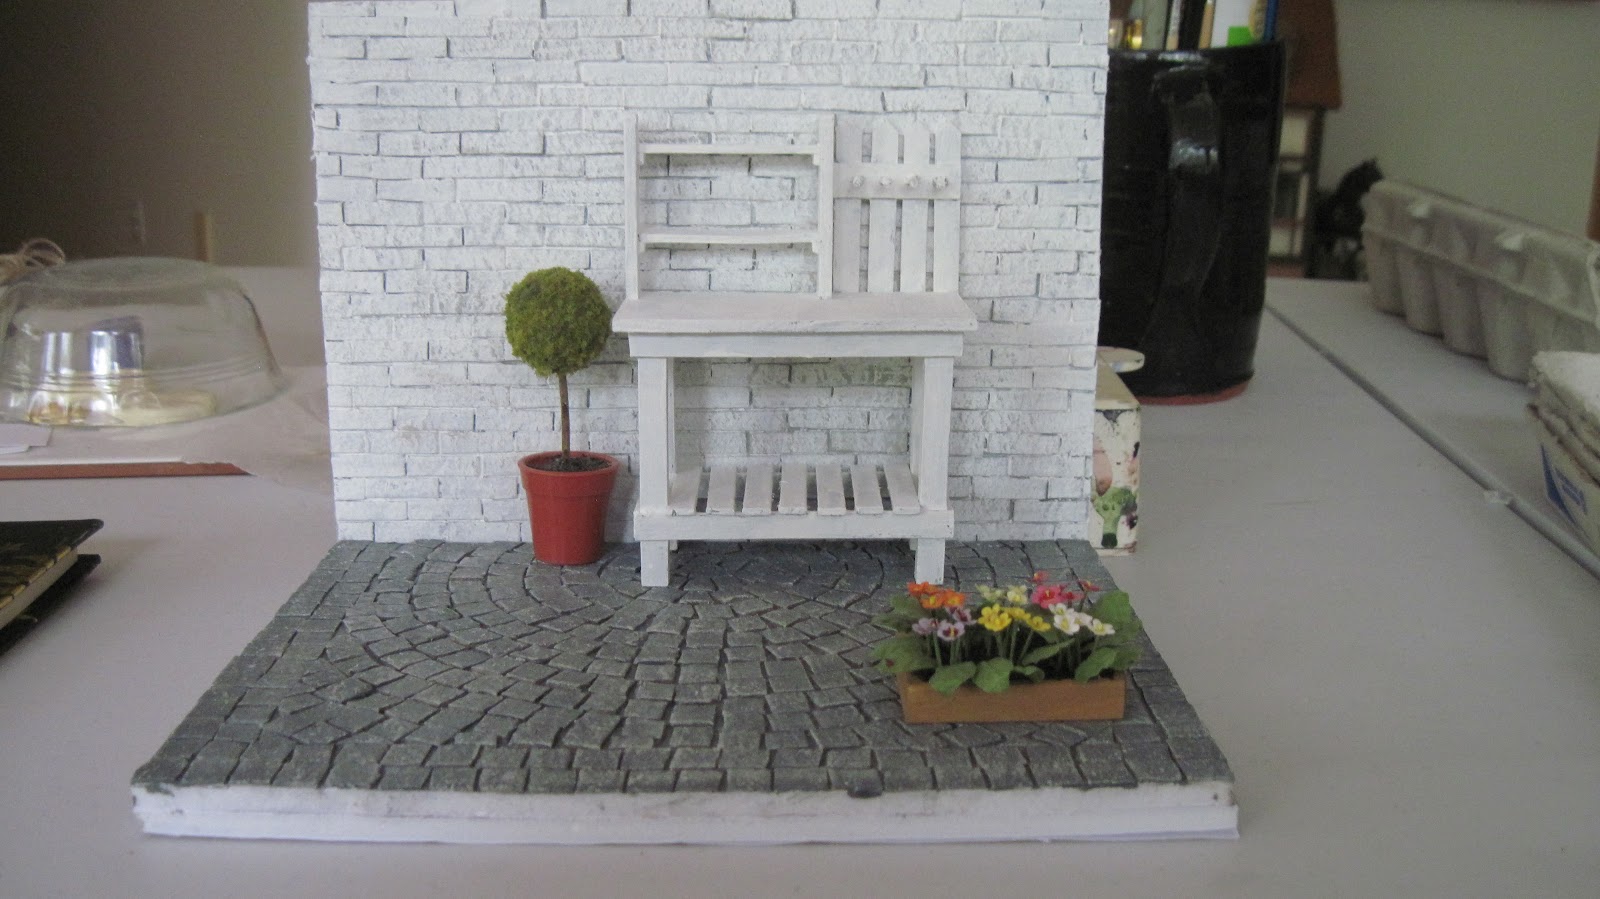
 The garden corner has a floor and a back wall, as well as a dedicated potting bench. The topiary and flat of primroses are there to give a touch of colour....

Next up is the right side fence wall, which I intend to build out of skinny coffee stir sticks; I have quite a few of those, and they are the right size for the fence design I have in mind. Remember, the design which inspired me, used foam core strips for the fence; however, I'm changing some things out to suit my personal design vision.

So far, three pieces of foam core (the base is double) and several egg carton tops have been worked into the corner vignette, now comes a bit of wood. I'm trying once again to use odds and ends around the house for this scene; I used the Trash to Treasure vignette to show people at the recent miniature show that you don't need to spend loads of cash to make an appealing miniature; you do use quite a bit of paint, however! And glue. And time. But it's worth it, so far! And very affordable for doing minis with children, too.

While painting the back wall, I squeezed one of my paint bottles a little too vigorously; out plopped a clot of dried paint (it was chalk paint, it really doesn't store well, I've found), followed by a biggish blob of actual liquid paint. Let's just say it was quite a mess....


Tuesday, 23 May 2023

Garden Items Seem to Appeal to Me

While whiling away a coffee break recently, I came across a small scene that really appealed to me. As I have a number of garden-y items sitting around that would work well in such a scene, I gave myself permission to start on it. 

The idea came from a photo labelled "Garten Ecke", and in checking it out further, I discovered there was a tutorial for it, in German, which I can follow with the odd reference to a dictionary. The designer has a blog, https://www.lilliput-homes.de if you would like to check this out. However, as this has not become a blue address, you will have to input it -sigh!


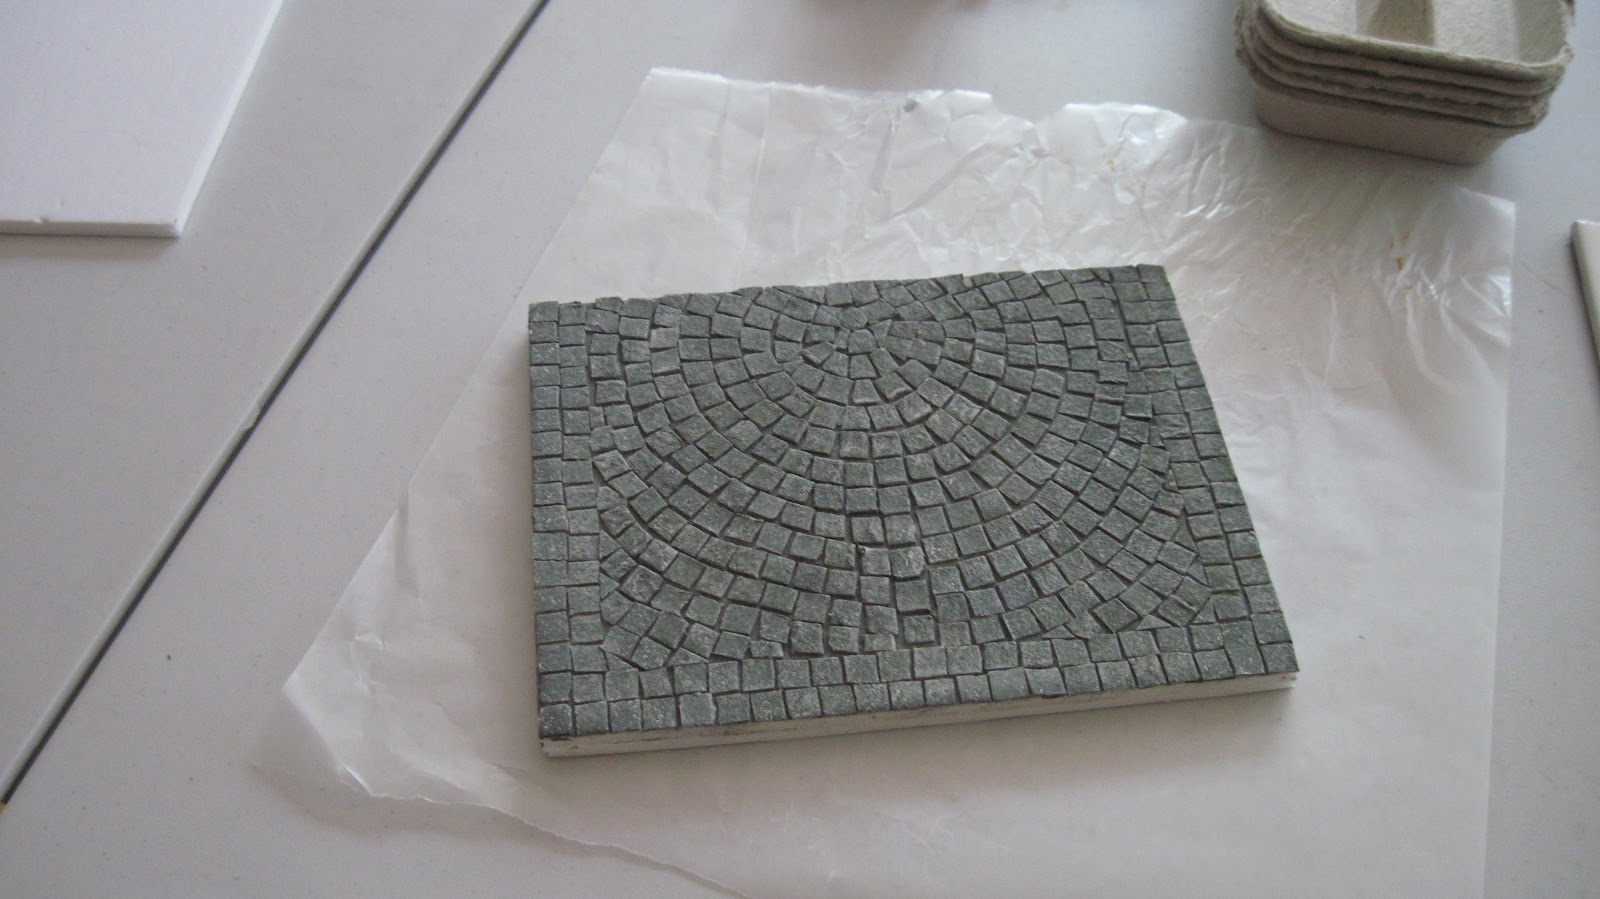
I began on the base over the weekend, which mimics a cobblestone courtyard corner. There will be a distressed/painted back wall, and a fence on the right side. The footprint of this project is 20 x 15 cm for the base (8 x 6"), so it quite small. The cobbles were made with egg carton bits, 5/16" square, roughly (about 8 mm square), with a double cobble border and a concentric but offset centre. This is pretty much what the original designer has done. I will also copy the back wall, but intend to modify the fence, as I want to use skinny wooden coffee stir sticks to make that. The original is all foam core.


Two possible candidates for this garden corner are the potting bench and the trellis planter I made during the early months of Covid. My hope is that the colour scheme will be gray and white, with pink, blue and mauve accents in the flowers and accessories. I am very eager to try another German tutorial, for Sweet William (Dianthus) flowers, which would work in terms of the colour scheme. Over the back wall, I'd like to drape a flowering vine of some sort; it's a toss-up right now with clematis somewhat ahead of climbing roses. And of course, my favourite apple green will make appearances, in moss between some of the cobbles, and in at least one or two accessories.

As I like to put mammalian life in my scenes, this one might get a lazy cat....

By the way, the Mestreechter dialect I spoke as a child in The Netherlands called cobblestones "kinder kopjes", which translates to "children's heads". I hope that refers to the size of the cobbles....

And, get ready, I will try to sell the finished product rather than keep it for myself, as I am trying (and failing, sadly!) to down-size. Now I really have to hope that there will be another miniature show!


Wednesday, 3 May 2023

Well, At Least the Desert Garden is Done


 I'm very happy with the way this little dry garden turned out; all the plants in it are the kind that require only minimal water, so they are ideal for dry conditions. The colours work well together, and if I have the energy I may add a little morning glory to one of the fence posts once the show is over.

The display I tried to make for the wooden furnishings fell to pieces, because I was using cheap dollar store foam core; I'm not sure of the best way to display the almost weightless pieces, but perhaps a glass base will be the best one. And the niches in my wonderful printer's tray are too narrow for most of the plants I'd hoped to display and exhibit. I've literally run out of time. You can perhaps tell  that I'm not too happy with myself right now.

Pricing and packaging will take me much of tomorrow afternoon; in the morning I'm expected at two back-to-back work meetings. I will have a little time Friday morning, but I have to pick up my passenger in time for the two of us to get to the show location by 3 p.m. - the drive is about 2 hours. Friday afternoon and evening will be occupied with setting up for the show. I'm hoping to borrow some boxes from work to carry the display pieces we're supposed to bring.

We'll see. 

Monday, 1 May 2023

The Little Desert Garden in Progress


It's not quite 7:30 a.m. on a very gloomy and windy day, Hello First of May!  I woke up early and decided I might as well use the extra hours, as I've got my knitting group this morning to attend. I hope to finish a lavender, purple and black hat I started with odds and ends of left-over donated yarns.

The space on my work tables is getting to be less and less, with all kinds of projects to be done for this weekend; the Moncton Miniature and Doll Show on May 6. The photo above is of the desert garden being "auditioned" with  placement of the plants. Two of the four fence posts are in place, there is a piece of wire ready to become the rusty fence wire, and desert-y rocks are being pushed around to see where they would best fit. I will probably have to make some more flowers to fill this small space (3 1/2 x 3 3/4" or 9 x 10 cm). Three of the edges will have wood trim, while the fourth will be an open edge. The foundation for the creeping phlox is already in place.

Although it may not be complete for the show, it will be very close to it; I'd like to run a piece of bougainvillea vine along the fence wire, and perhaps some deep purple-blue morning glories along one of the posts. However, they will likely have to be done once the show is over. 

Now, if only I could find a tiny scale lizard or perhaps a longhorn skull; maybe at the show? And can I turn styrofoam bubbles into a convincing cactus? Stay tuned!


Friday, 21 April 2023

Getting Ready for the Show

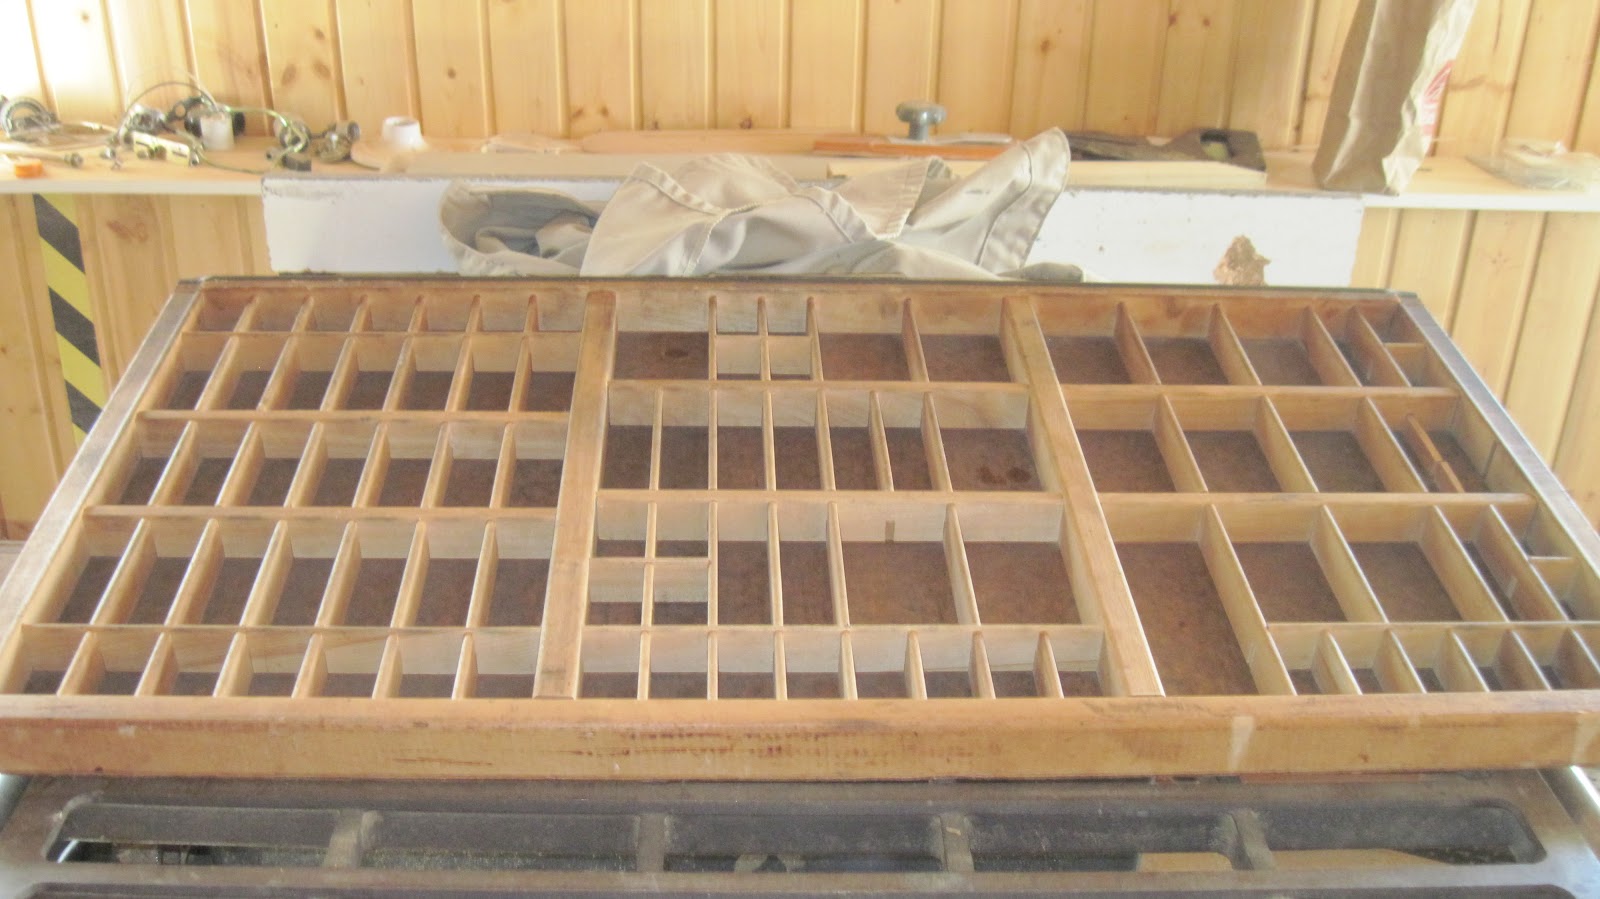
 On May 6, the last ever Moncton Miniature and Doll Show is being held, and I am in the process of finishing up some things I began during the last three years of Covid. Recently, I was gifted with a genuine printer's drawer, lots of tiny niches, and it is being prepared for me to use as a display at this show. I doubt i"ll be able to fill all the niches with sales stock, but it is worth trying.


As Spring has finally sprung here, the Carpenter-in-Chief is busily pruning apple trees and getting some seedlings started for his vegetable garden, but he thinks he can figure out a way to have this stand up on my sales table. This drawer is quite heavy, understandably so since old moveable type was usually cast in lead, which means the support has to be really, really good. Lots of spaces for tiny items in this thing!

We had our mini meeting via Skype again, as Louise's husband developed Covid, and she herself wasn't feeling all that well either; however, both Marilyn and I worked away, and I potted up some small yucca plants and echeveria. The String of Pearls plant is for my flower shop, I'm keeping that one, although it won't work in the little wall planter.


Geraniums are being prepared as well, as I have quite a few of the tiny blossoms ready to be glued onto their ball heads. Somehow, I have no more geraniums in stock; before Covid, I had about a dozen in assorted colours. I have about 2 weeks to make and sort things to take to this show, which is sadly the last miniature show in the Canadian Maritimes; the ladies who have organised this for the past 35 or so years are all more than ready to retire, and unfortunately, there are no new younger miniaturists who have the time to take it on. It will be missed. The nearest show to us here is the Montreal show, the next nearest are in southern Ontario, and there is at least one still in Alberta, but those are long distances to travel!

As well as making some items for the show, I need to go through all my piles of works in progress, as I can't quite remember what I had prepared in the past 2-3 years for sales purposes, and there is literally stuff all over the place!


Thursday, 30 March 2023

One More for the Desert Garden


 Yesterday we were able to have a mini meeting, and I decided to add something small to my deserted desert garden, a small group of echeveria/hens and chickens/house leeks. They turned out very much as I'd hoped, and will add a bit of darkness at the front of the garden.

They were made of olive green card stock, tips coloured with purple colouring pencil, using a couple of sizes of the same punch shape. I'd made these before, and really like the way they turn out. Making a large plant, a very small plant and several medium size ones makes them look more like the real thing....

I need to haul out my polymer clay and make a couple of cactus plants, too. An aloe vera would work, as well as an opuntia, perhaps with a single blossom. We'll see!


Wednesday, 22 March 2023

Finally, Working Again!

 It has been a very dry period of getting any minis done, as we have had to cancel our weekly get-togethers for a month or so. Marilyn of Charminis was suffering from mini withdrawal, so although our other co-mini-ist Louise was unavailable, we just had to get together.

I had the good luck over the weekend of finding a bag of small plastic Easter eggs in a charity shop, an item I'd been looking for for a while, as I needed them to make lampshades for my wooden shoe factory.


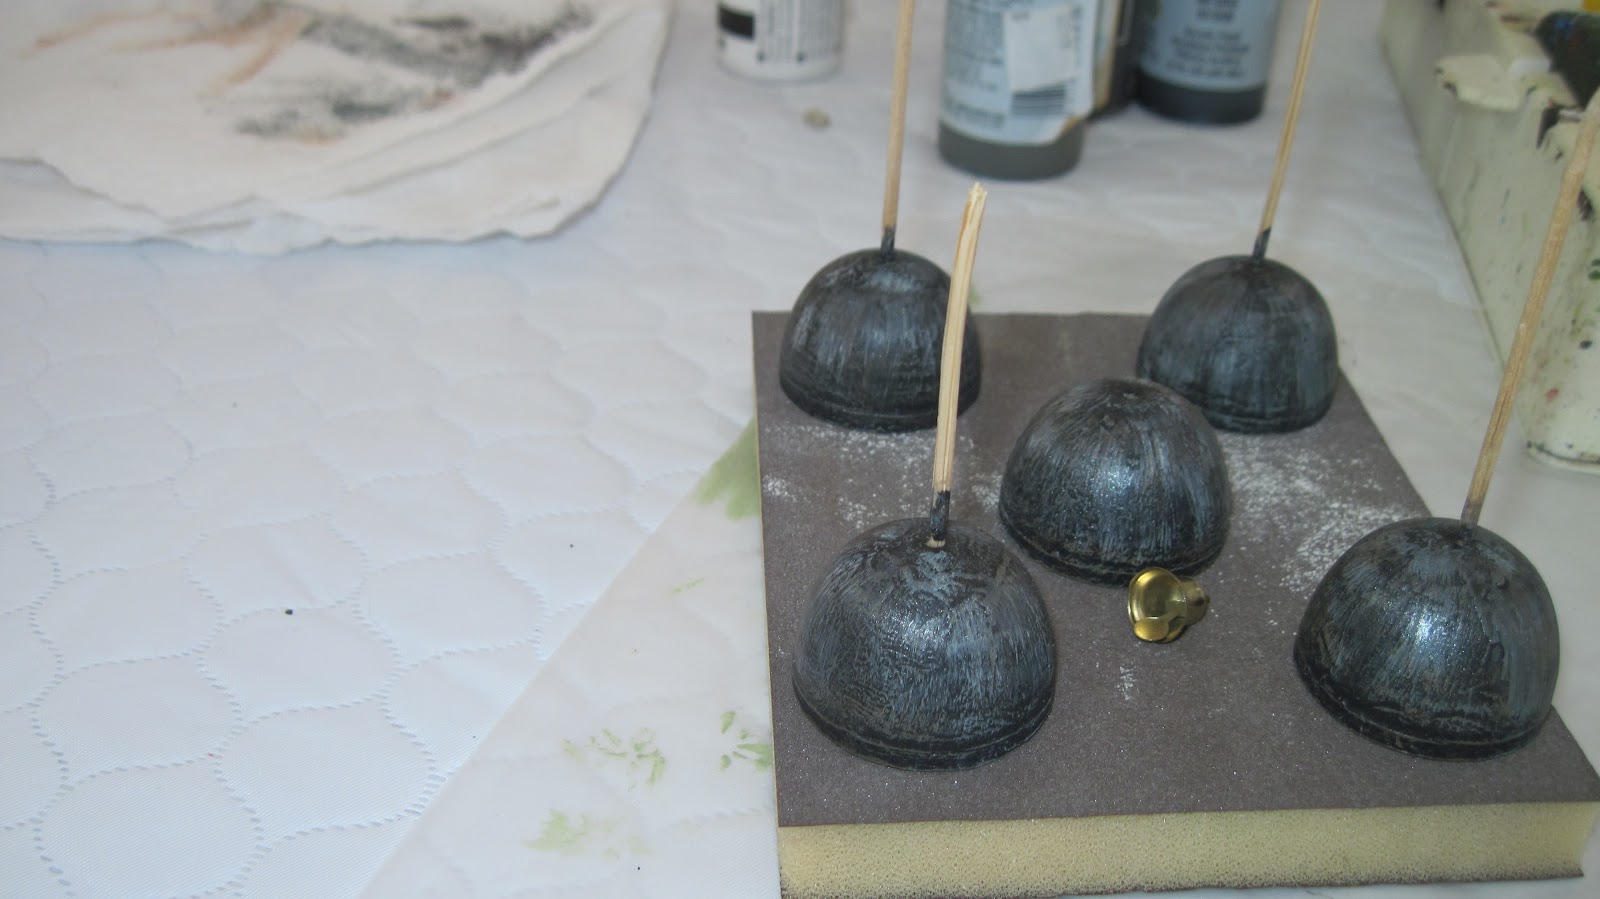
I used the rounder end of the plastic eggs, but as they had a thin rim on them, I cut narrow strips of cardboard (found in between layers of cat food tins), to fill the gaps. The centre was then drilled with my pin vise to create an opening for the wired bulbs, and the hole enlarged a bit with a round rat-tail file. (The upper, more pointy end of the eggs might make good bee-hives, with the addition of rope or raffia to mimic the straw old skeps were usually made of.)


Three eggs have their strips, glued on the plastic with Aleene's Jewel Glue, held by tiny copper clamps. I pre-bend the strips by rolling over them, on my thigh, with the round handle of my Xacto knife.


The egg halves had small air holes in them, which I plugged with toothpick bits or the ends of bamboo skewers; then I sanded them flush to the surface of the eggs with an emery board. The yellow half shows the hole, the green one a plugged hole.  They were then lightly sanded with a sandpaper sponge, and given a coat of multi-purpose sealer. This was then allowed to dry while I had some lunch and awaited Marilyn's arrival.


I stuck toothpicks in the eggs to use as handles while painting them. First, I lightly sanded the surface to provide something for the paint to grab on to. The first paint was a gel one, which did not adhere at all on the plastic surface. However, plain black paint covered with no problem. When I first used an Easter egg half to make a lamp shade, we used nail polish to colour them, but I wanted worn, slightly dusty and rusty metal shades, as my wooden shoe workshop is set in the last decade of the 19th century.


Multiple coats of dry-brushed gray, terra cotta, burnt umber and pewter paint resulted in just what I had envisioned when I started the project. The little brass bell will become the top of the shade, just as soon as I found where I "hid" the others....

The last stage will be to paint the insides a dirty white - well, the workshop produces lots of sawdust, coal dust, and so on, so the inside would not be pristine. I intend to use LED lights already on their wires as the light bulbs, threading them first through the plastic shade, then through the aged little bells, and finally through a length of fine brass tube. The wires will then have to go over the top of the workshop and down again to under the stairs, where the batteries will hide. One section of stairs will be removable so allow access to the batteries - I hope!

Now to let everything dry, then I will finish the insides of the lampshades.