Thursday, 18 August 2022

Small Progress Report

Real Life keeps getting in the way of making minis, but I did manage to get some things done. Currently, I have a box of unfinished kits into which I'm dipping when I have a bit of time to mini. Over the last ten or so days, I've manage to actually finish one of those kits. I made some slight adjustments, as the designer provided two sets of card bases for the lid and I didn't really like the thickness of that arrangements. Which means, of course, that I fiddled with it, came up with a single lid, then had to rethink the hinging arrangements, and while I was at it, I also replaced the silk ribbon ties provided with some cordonnee embroidery thread. The proportions were more acceptable to me.


The fabric provided is very dainty, and I still have some left for another small project, at some time. The bottom of the basket is also covered with a card covered with this fabric. The two halves of the lid lift up, thanks to a fabric hinge which also covered the raw edges of the fabric on top.


The little basket is woven "wicker", made with waxed linen cord. I like it, although I don't actually have a use for it right now, but I suspect it will end up in the scullery room box, currently on loan to a local living museum. There is a basket of mending in front of the settle bench, after all.


As strange as it may look, this is a view down into the bird cage, with the Japanese newspaper covered in gravel secured to the bottom. Next is the bird, and Lady Iolanthe, my older daughter who at times comments on the blog, will be here on Saturday for 3 weeks, so she can help me figure out the best sort of bird to put in the cage. She suggested a Japanese nightingale, but it may be too drab in colour to show up in the cage....






Monday, 8 August 2022

What I'm - Very Slowly - Working On

 My camera has been fixed, and I can use it again. It was actually fixed for me by a very nice young lady in, of all things, a record store! The mall directory implied they also dealt with cameras, but I was informed that the mall lumps records, videos and cameras together, for some reason.


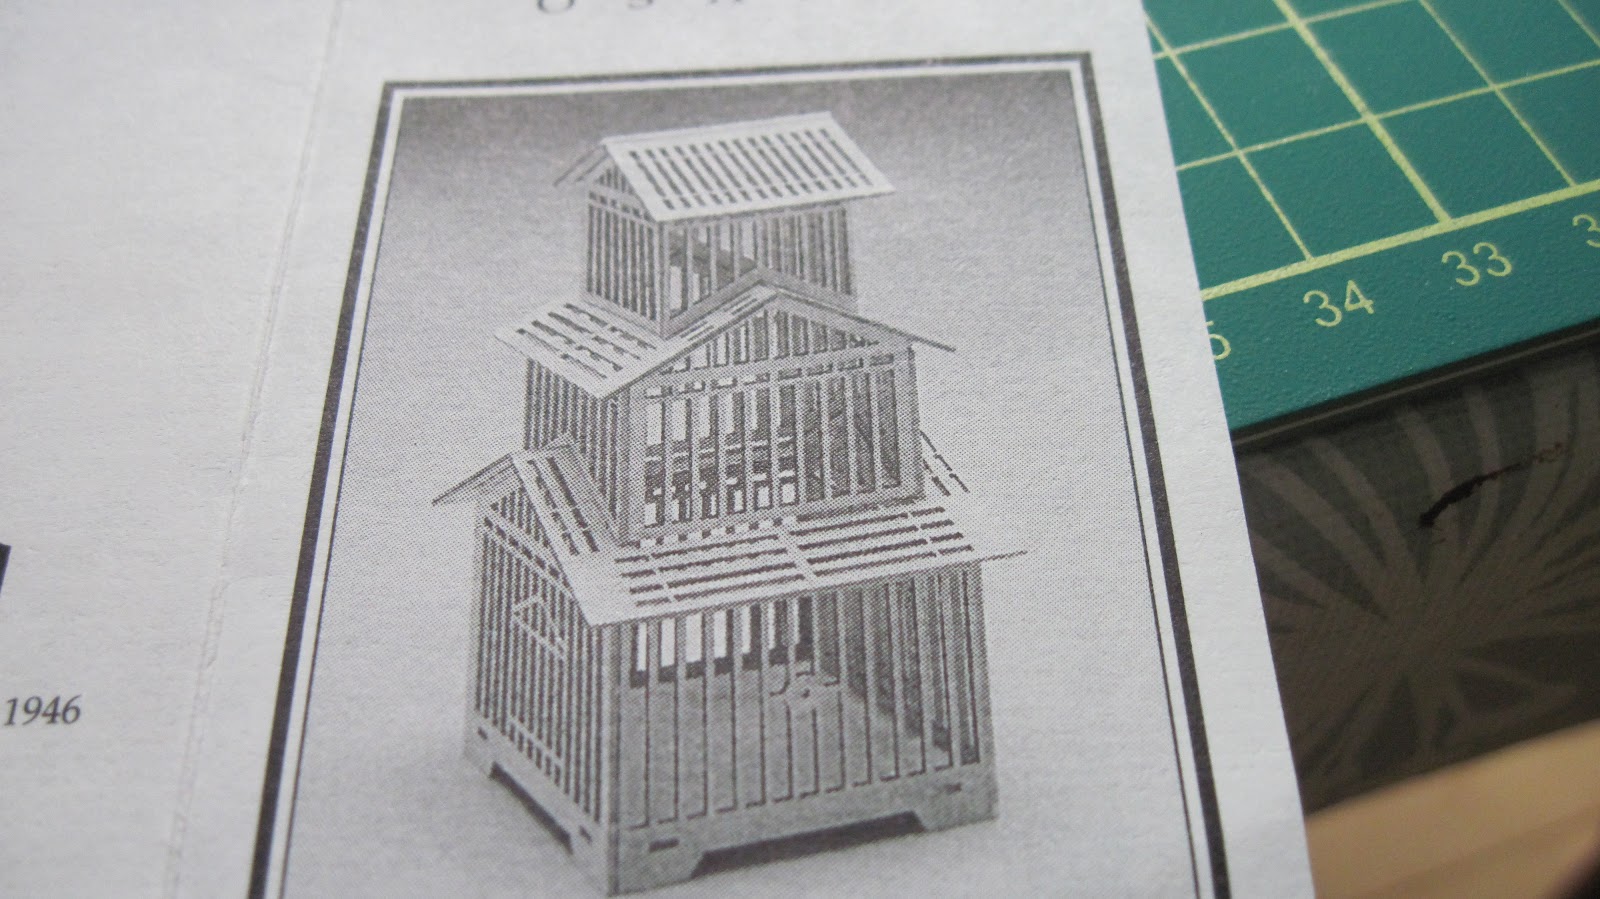
This is a very old, laser-cut kit that was won as a door prize at either the Camden or the Boothbay Harbor, both in Maine, miniature shows, at least twenty or more years ago. It has taken me a while to get up the courage to assemble it, and at this point, I'm not sure who in the family actually won it. Anyway, I hope I can use it in my Japanese Garden room box once it is done.


This is as far as I have gotten; the instructions tell me I must be sure things are dry before I go on to the next step, and with our busy summer so far, I've got half the roof on the first level. I need to decide if I am going to put old newspaper and gravel in the bottom, and that has to be done before the next level goes on. I'd also like to put a bird on the perch, which goes right across the cage, and I'd like both the bird and the newspaper to be Japanese, to fit with the room box's theme.


There are a lot of very fragile pieces in this fabulous kit, and I have to fight the cat constantly to protect the bits that I've already glued! Another (one-day) trip is supposed to happen mid-week, so I hope to do the newspaper and gravel by the weekend, leaving me time to make the bird before our next very welcome visitor arrives, next weekend, for a 3-week visit. Stay tuned!


Friday, 22 July 2022

Problems!

 Today, I took some photos of a project I'm working on, but I did something wrong with my camera, and can't find the expanded user manual to help me deal with it. So it will be a while before I can get to a camera store to see if some kind person will help me....

I'm getting overlapping small images with all sorts of frames and symbols on them, and the quick user guide is no help in solving this particular problem.

Bah!


Tuesday, 5 July 2022

My Scullery Room Box Is On Display!

For the past 15 years, I've been a volunteer at Kings Landing Historical Settlement, an open-air museum about 25 km from where I live. I started out weeding a spectacular garden, was asked to set up an in-service library, then when space restraints meant the end of the library, I went to work doing museum accessioning. That means I get to handle the artifacts, and I've been quite happy doing that.

This year, I was asked to assist the exhibition team from June until October, when the site closes for the winter. I love this opportunity, as we are able to pick and choose lovely items from the collection that rarely get seen; the mandate of the museum is featuring United Empire Loyalist settlers, most of whom were farmers and artisans, like smiths, carpenters and the like. (For those of you in the US, the United Empire Loyalists were people who came north to Canada around the time of the American Revolution, or as planters.) They tended to own the bare minimum of "stuff".

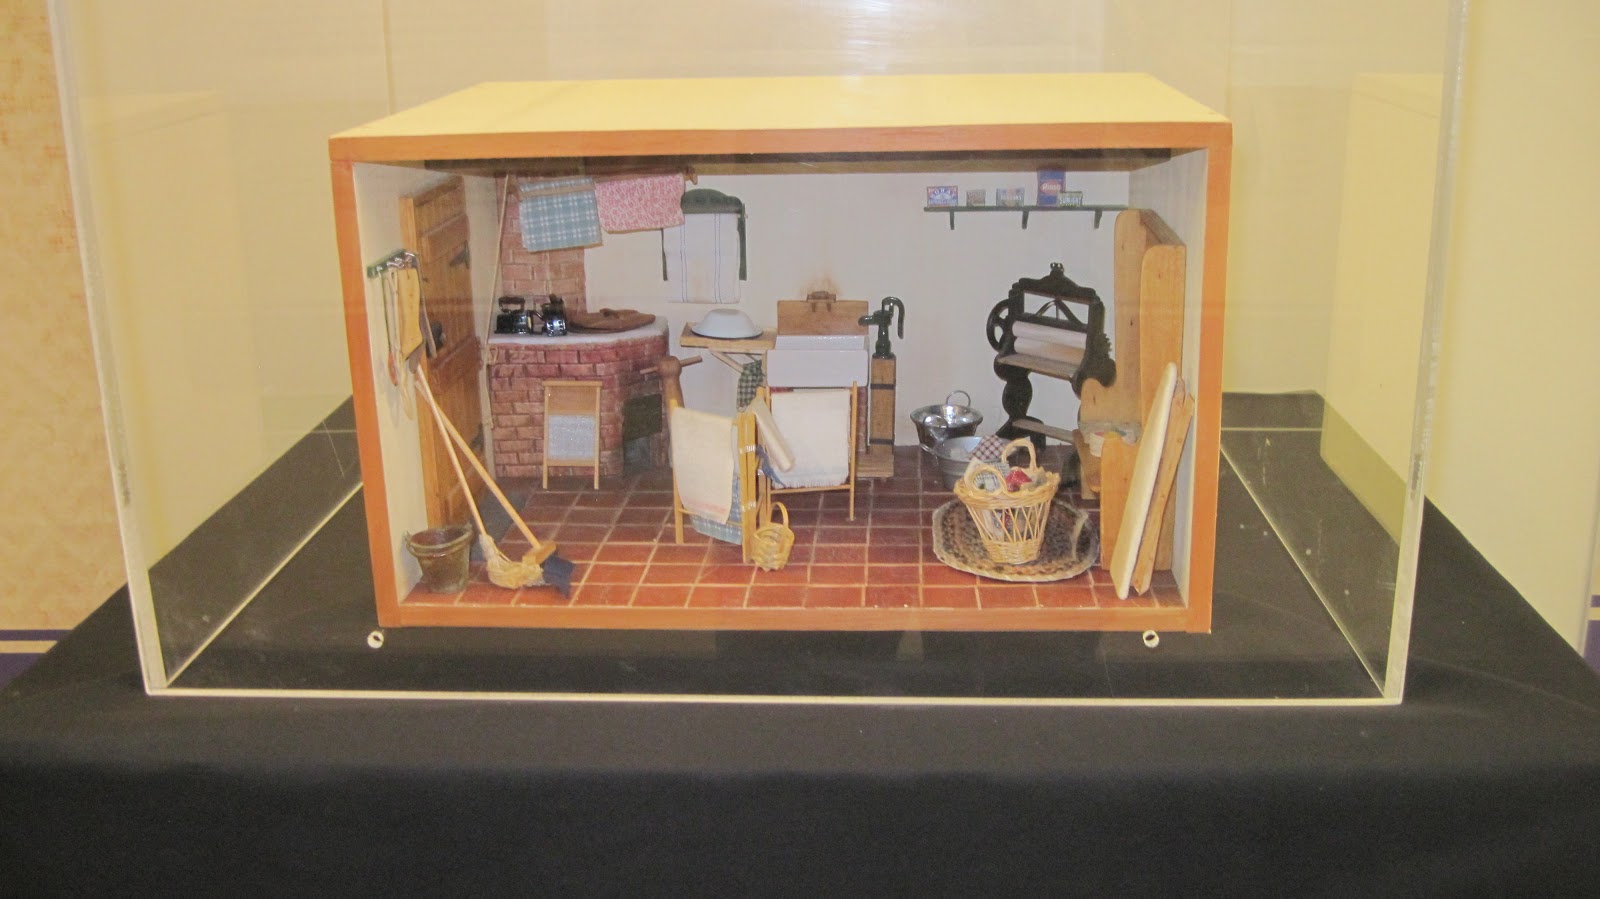
One of the full-season exhibits this year is the business of laundry; all the tools etc. for hand-washing the family's soiled clothing. The scullery room box below is part of that exhibit this year, and I couldn't be prouder!


There is a long, wide corridor that leads to the washrooms in the Welcome Centre, and that is where the washing exhibit has been placed. Something for Moms and Dads and kids to do while their families use the washrooms! The scullery room box has most of the washing tools displayed full size in it. and is being used as a narrative for the work involved in keeping your clothes and so on clean before the advent of  washing machines and dryers, and no-wrinkle fabric finishes.


A closer look at the scullery room box. Just about everything in this box was made by me; it began with the mangle in the right back corner, and then took on a life of its own. Lots to see, and a story without words.

Our first guest of the summer has headed back home, and another is arriving in August, to be followed by our third child and his wife in September. It is so lovely to see all our children in the same year; it has been 3 or 4 years, pre-Covid, that we saw the two older kids. We've missed them!


Sunday, 5 June 2022

A Couple of New Plants

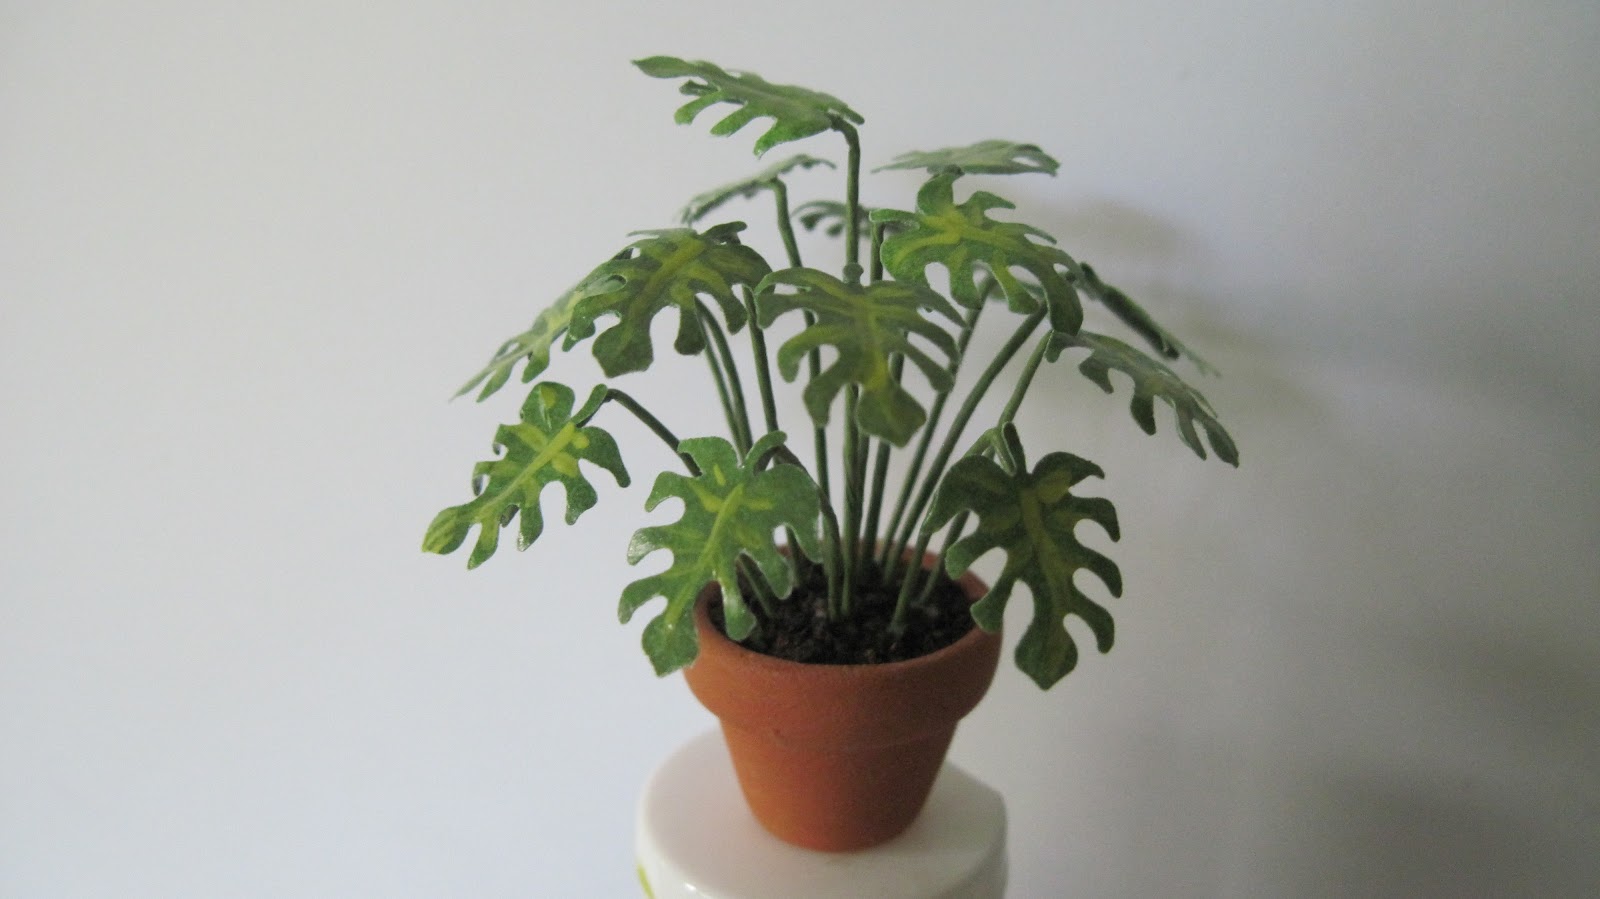
 Among the items in the things from our mutual miniature friend was a punch for split-leaf philodendron leaves, so I had to try it out, of course. But first, paper needed to be painted, as I'd gone through almost my entire stock of leaf paper. Marilyn was putting together a fuchsia kit here Friday, so I painted on the other side of the breakfast bar. 


I do like the leaf, but wish I had more than one size; the more sizes of leaf one has, the more convincing the finished plant. This one is intended to go into a planter, which has disappeared - and I'm blaming the cat, who has been batting around every tiny thing she can find! I think she may be heading into a sort of second kitten-hood, as she is 12 years old....

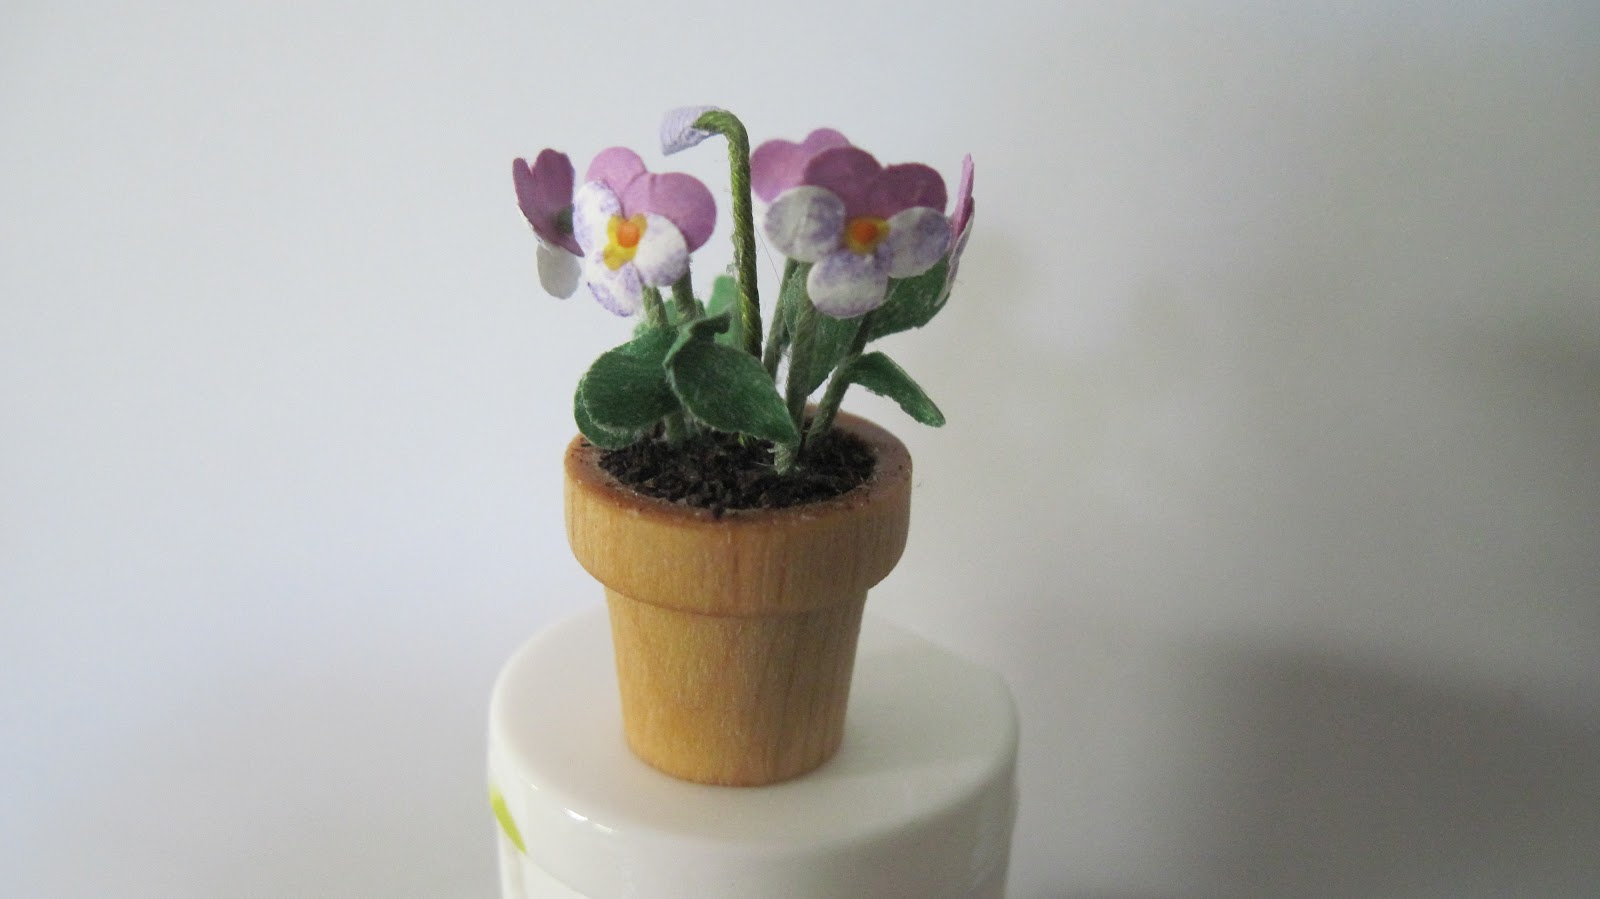
I mentioned a pansy kit; the finished product is shown below. I found I prefer my own method, and there were some things about the kit I rather didn't like. For one thing, the paper is very soft, and didn't take well to my colouring pencils. For another, the pot had plasticine stuffed into it, so the oil in that got into the wood, which will not take paint now. I did the best I could, adding a wee bead of orange paint in the centre of the yellow to add a bit of depth to the flower. (A better thing to use for "dirt" in miniature plants is something like Crayola Model Magic, an air-dry clay that takes paint and glue very well!)


There were only five pansies, so I added a bud. The kit had absolutely no room for mistakes; five heart punchies in purple, fifteen teeny white circles, ten leaves, and five 1" (2.5 m) stems. When I've taught flower making, I've always included practice punchies and longer wires, for those inevitable mistakes newbies  tend to make....

I'm still experimenting with the lily and Schefflera kits; my conclusion at this point is that I should quit while I'm still sane, and see if I can reproduce both of these very well-designed plants with some of my own paper. (I do believe I still have a Hanky-Panky lily kit that I've never assembled.) The laser-cut pieces of the lily and Schefflera are perfect, especially the lily stamens and there are some punches in my collection that I may be able to trim to the desired shapes - except for those marvellous stamens; they could only be made with a laser cutter. 

My younger daughter arrives this week for a nearly 3-week visit, and the day after she arrives, the Carpenter-in-Chief and I have to drive to Quebec City, for a funeral delayed due to Covid. We'll drive the day of the life celebration, stay overnight and head home on Saturday, and our daughter can look after that darn cat while we're gone! She will likely use my car to visit her best friend not far from here while we're away.

Friday, 27 May 2022

An Experiment in Rehabilitating Paper Plants

We did some more sorting of our mutual friend's miniature stash, this time we dealt with landscaping materials and a variety of flower-making materials. Among the stash were a number of plant kits, very well done laser cut kits, that Marilyn and I shared as Louise is not about to try making plants when she knows people who can make them for her....

One kit had been finished, but in the moves and with the packing, it had suffered; that one was easy to fix, as you can see below:


This is a gorgeous caladium kit. When I got it, there were several bare stems, and a stem with a leaf that was just in the box. While sorting, I found the missing leaves, so they were duly glued back on to their stems. The stem with the leaf was replanted in a bare spot, and two stems that were too tall were cut short and now look better. Easy!


These are most of the stems and leaves for a Schefflera (Umbrella) plant. The paper used is much softer, and the baggie in the foreground contains some of the leaves that had come off the laser cut leaf rosettes. I've more or less repaired the leaf at the extreme left, strengthened some of the very tiny ends of the leaflets with a dot of tacky glue, and given the leaves some shape. The larger leaf rosettes should have nine leaflets, while the progressively smaller ones have seven and five. All of them need strengthening and shaping or re-shaping. This one is rather more of a challenge....


I don't know about this poor thing! There should be at least seven lily stems, but this is all that was left. I can probably re-do the petals by trimming a similar punch I have, and there are lots of leaves yet to release from the laser-cut sheet. But, I don't have the stamens, which are very delicate dots on the end of tiny stems; one is all that there is on the bare-looking stem. The leaves on the finished stems are placed rather too close together, and I am not sure sure how I can get those off; I may have to carefully cut each leaf rosette off the stem, and then carefully glue it back in a better position. Again, the leaf paper is very soft, and therefore very fragile. Sigh! I love these lilies, and would very much like to make them "come alive" again.


The hydrangea kit hasn't been put together, but I found the tiny blue blossoms everywhere while tidying up! I hope there are enough to finish the plant. Everything but the wires were present in this kit, but I have lots of that kicking around. The iris kit is complete, made in a different way from my technique, and I'm interested to tackle it.


The last kit, by a different manufacturer, is a pansy kit. Again, this kit uses a different technique from the one I use, and I do want to add some additional colour; the kit has little purple hearts and tiny plain white circles for the flowers, and they will require some additional colouring work to look good. This one came with a pot.

All the kits came with their own "dirt"; I use unused tea leaves, so I'm interested to see what the dirt in these kits is made of. I am not sure if any of these kit makers are still producing flower kits. One of the kits Marilyn got is a fuchsia, and I'm very curious as to the shape of the flower parts the designer of the kits used; all the magazine and on-line instructions I've seen make flowers that are rather out of scale.

I do have some kits in my stash that I haven't made up yet; another UFO project, some day!

The last container of mini stuff we have to sort through is a heavy load of polymer clay....


Thursday, 19 May 2022

Now Where Did I Put My Heart Punches?


I actually started this physalis or Chinese Lantern plant a week or more ago, but have somehow managed to lose all of my heart punches in some weird place. However, during our sorting process of a friend's stash, there was a triple heart punch the right size. Just one small problem, the actual die-cast punch part is in the plastic housing the wrong way around. This means punches have to be extracted from the works with tweezers. Things can get a little complicated, sometimes....

However, yesterday our meeting did not happen due to other things, so I decided to work on the plant. It is in a pot because, although very decorative, it is also very invasive! The original instructions came from a Jicolin Advent Calender in 2011, by Minipat, a French blogger. She used tissue paper for her flowers, which I usually replace with coffee filter paper. The backwards punch would not punch this light paper, so I decided to use computer-weight coloured paper instead. The flowers are made of a seed bead in the colour of the flower, glued to a stem. Two hearts are applied points up, and when they are dry, two half hearts are glued over the sides of the "heart sandwich".  

As my paper was stiffer, I creased each heart down the centre and then rounded out the lobes of each heart. The half hearts are also rounded out before being applied. Although not entirely successful - the seed bead shows in some places - I am pretty happy with this version of a Chinese Lantern in miniature. It would look good in miniature "dried" flower arrangements. along with lotus and milkweed pods, which I have made in polymer clay in miniature....

We miniaturists are sort of crazy....